Sunday, October 3, 2010

Organic Growers Week

While I was organizing the Toronto FRESH Event, I was fortunate to meet two very passionate and involved people from the Toronto Chapter of Canadian Organic Growers. I liked Tanmayo and Elizabeth right away, not only because they were supportive of the FRESH Event, but also because they were so friendly and genuinely committed to promoting organic growing.  They agreed to participate in my event and sponsored a Gardening Workshop and Potluck Dinner and generously supplied organic popcorn for the screening of the movie. 

I was so impressed by their commitment to and passion for organic that I decided to get more informed about the subject myself.  As you all know, I am very committed to home cooking and fresh ingredients, but I have been spotty on whether or not organic mattered.  Now I have become a convert and I'll tell you why.  It's quite simply that if I can buy something that has been grown and produced without the use of chemicals, pesticides, hormones and antibiotics why would I not choose that over something that has.  Sure, it can be more expensive (but I am a big believer in you get what you pay for) and it can be inconvenient (until you get a routine established) but at the end of the day I like knowing that what I eat has been raised with as little chemical interference as possible. In the end I think the benefits to individual health and well-being as well as to the environment far outweigh any other consideration.

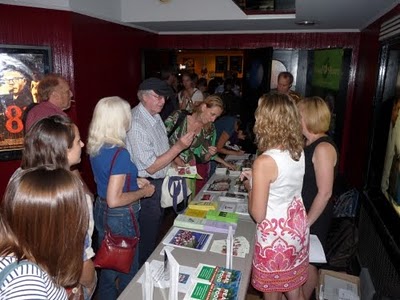
Just last week Elizabeth contacted me to ask if I could help them promote Organic Week and, in particular, the events hosted by the Toronto Chapter of Canadian Organic Growers.  I was more than happy to help.  Organic Week runs from October 9th - 16th.  There are a number of interesting events and I encourage everyone to go and find out for yourself if Organic matters to you.  At the very least, you will have a chance to inform yourself on the topic.

COG Toronto's events in celebration of Organic Week Oct 9-16


Saturday - Thursday, October 9 -14

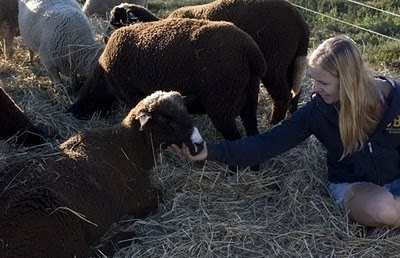
The Passion and Principles of Organic
Rotunda of Metro Hall, 55 John St., Toronto

This is a photo exhibit and commentary, featuring photos by Anna Prior. Get a sense of the commitment and challenge of growing organically and the beauty and benefit of organic food through stunning visual images.


Thursday, October 14
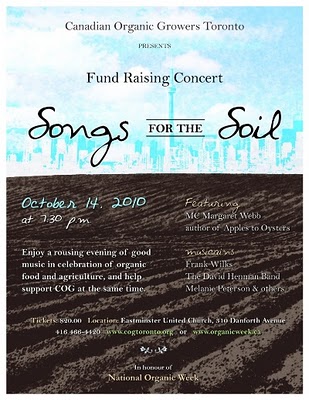
Songs for the Soil
7:30 pm
Eastminster United Church, 310 Danforth Ave., Toronto
Tickets (non-refundable): $20

This fundraising concert for Canadian Organic Growers and the Withrow Farmers Market will have Margaret Webb, author of Apples to Oysters as MC and will feature the David Henman Band, Frank Wilks, Melanie Peterson and others. David Henman is the co-founder of April Wine, an inductee in the Canadian Music Hall of Fame. Frank Wilks is the former lead singer of Buffalo Springfield Revisited. Melanie Peterson has an inviting melodic sound sure to enchant. The evening promises an eclectic mix of original songs in styles ranging through folk, rock. blues, pop and sweet lyrical. Enjoy an evening of good music in celebration of organic food and agriculture, and help support COG at the same time.


Sunday, October 17
Carrville Garden Potluck and Kitchen Table Talk
3:00 - 8:00 pm
Carrville Community Garden, 9100 Bathurst St., Thornhill
RSVP: [email protected] or 416-466-4420
Carpooling can be arranged.

COG Toronto is partnering with Carrville Community Garden to host a potluck, garden experience and Kitchen Table Talk. For those interested in the garden, people are invited to come at 3:00 pm for a supervised work and learning session, hands on in the garden. This is your chance to learn and experience organic gardening methods and find out what biodynamic gardening is all about. At 5:30 pm, we will join in a potluck dinner at the garden - yummy. In honour of organic and biodynamic gardening, we invite you to bring dishes made with organic ingredients. And if possible bring your own dishes and utensils to save on excess garbage and keep this a truly green experience. Then participate and contribute your thoughts on what Canada’s food policy should look like during the Kitchen Table Talk. Here’s an opportunity to have a voice in the People’s Food Policy initiated by Food Secure Canada. The results from across Canada will be presented to our leaders as the true voice of a Canadian food policy.

Carrville Community Garden is communal biodynamic gardening at it’s finest. Together members organize, grow and share an acre and a half of diverse vegetables and herbs. They do not own or rent individual plots, but share the bounty and work of a well organized and run garden with many more options and growing choices.

Monday, September 27, 2010

Homemade Salsa


Look at that picture.  Doesn't that just look like the height of harvest season.  Gorgeous fresh tomatoes, pepper, herbs...just calling out to be turned into salsa.  At the farmer's market in Campbellford there is a gentleman that sells these baskets with his own homemade salsa recipe tucked inside.  We buy one every once in a while and make a great big bowl of salsa.


Once you make your own you will never want to go back to a jarred version. It is just so much fresher and open to so many possibilities.  The basket we picked up last time had plenty of tomatillos, which is a nice change.  They add a sour note to the sweetness of the tomatoes. I always ask to switch in parsley for the coriander (I personally think that coriander should be outlawed...blech) And, as an alternative, a few more times around in the food processor and your fresh salsa becomes a lovely gazpacho.  Add a few chunks of English cucumber and chopped tomato for garnish and you have a quick and delicious light lunch. Either way, it is a great way to enjoy the best of the season.


Homemade Salsa

3 cups tomatoes, chopped finely
1 cup tomatillo, finely chopped

1/2 cup onions, coarsely chopped
1/4 cup green pepper, coarsely chopped
1/4 cup red pepper, coarsely chopped
6 -7 cloves garlic, finely chopped
fresh jalapeno pepper, finely chopped (add as much as suits your taste)
1/4 cup coriander or flat parsley, finely chopped
2/3 cup red wine vinegar
1 tablespoon salt
1 teaspoon white (or black) pepper

You can chop all of the vegetables by hand or in a food processor.  I use a food processor, but I also hand chop about 1 cup of the tomatoes and 1/2 cup of the tomatillos as I like my salsa to be more chunky. 

If you use the food processor, first add the garlic and jalapeno. (I started with just a 1/4 of the jalapeno as my kids don't like it too spicy) Pulse until they are finely chopped.  Then add the onions and pulse a couple of times. Add the tomatoes, tomatillos and parsley (or coriander) last so that they do not get too finely pureed.
Pour the mixture into a bowl and add the remaining ingredients.  Stir to combine.  Adjust the seasoning to your taste.  Serve with chips, pita or over grilled fish or chicken.

As an alternative, you can add 1/2 an English cucumber and puree until smooth and serve chilled as gazpacho.

Monday, September 20, 2010

Cinnamon Buns


This seemed like a good recipe for a crisp Autumn day. Cinnamon Buns...there is nothing like them, warm out of the oven on a cold morning, it just makes the whole house smell delicious. 

I have been craving them for a while, ever since my last trip up to my parent's place.  We visited my uncle's bake shop (the same shop my grandfather used to run) and bought Chelsea Buns.  That is what my Grandfather called his cinnamon rolls.  When I got home, I found I was still craving them. That warm, heady smell of yeast and bread rising mixed with the thick perfume of cinnamon is almost visceral for me. 


That, to me, is the essence of being in my grandfather's shop. Early in the morning, before it was open and before customers were coming and going, the air always felt very close, almost unbearably warm and humid. The combination of the ovens heating and the proofing room full of rising bread created a warm cloud of sweet smelling air that hit you as soon as you walked through the door. Even now, whenever I go into a bakery, I experience the same feeling I used to have walking into my grandfather's shop early in the morning. It's hard to describe, it's almost like I feel it in my chest and my head at the same time, memory mixed with the aroma of bread baking.

I think my grandfather liked working with the bread the most. It had endless possibilities...egg bread, brown bread, sweet bread, bread brimming with cheese or little delicate rolls that he would shape into ovals or rounds or ones that to me looked like butterflies in little cups. But best of all was bread that he rolled flat, filled with cinnamon and sugar and baked in a pool of caramel sauce.  There were 12 in a pan, smaller and more delicate that the monstrously large cinnamon buns you can buy now. 

This recipe is not the one from the shop, but it is a very close approximation.  I used the Challah recipe from the Artisan Bread in 5 Minutes a Day cookbook and I followed the directions to turn the bread into cinnamon rolls.  They turned out beautifully. Because the recipe came from that cookbook the dough was very simple to make and easy to work with. The recipe seems daunting, because there are so many steps, but do not be turned off by it.  It is easy to do and you will have the reward of a beautiful smelling house and and a wonderful treat just waiting to be enjoyed. 


Cinnamon Rolls
adapted from Artisan Bread in Five Minutes a Day by Jeff Hertzberg and Zoe Francois

1 3/4 cups lukewarm water
1 1/2 tablespoons granulated yeast (2 packets)
1 1/4 tablespoons salt
4 large eggs, lightly beaten
1/2 cup liquid honey
1/2 cup butter, melted
7 cups unbleached all-purpose flour

Part One: Making the dough

Mix the yeast, salt, eggs, honey, and melted butter with the water in a large bowl or food container. The dough will stay in whatever vessel you use to mix it in, so make sure it is large enough to store the risen dough but small enough to fit comfortably in your refrigerator.

Using a wooden spoon, mix in the flour. The flour must be completely incorporated so you can use an electric stand mixer if you have one with a big enough bowl. Other wise, stir until the flour is completely combined to create a sticky loose dough. You can use wet hands to incorporate the last of the dough if you need to.

Cover your container and allow the dough to rest at room temperature until it rises and and falls back a bit, or becomes flat on top. Make sure when you cover the container that you leave it open a bit to let the gas created by the rising process to escape. I cover my bowl with clingwrap and leave a little crack loose on one side. The rising process will take about 2 hours.

Once the dough has risen it can be used right away or can be placed in the refrigerator for future use. Due to the eggs in the recipe is should be used within 4 days. If you can not use it in that time, cut the dough into one pound pieces, about the size of a grapefruit, and freeze them in freezer safe bags for up to 4 weeks. Remove as much air as possible from the bag before placing in the freezer and defrost in the refrigerator overnight when you want to use one.

Part Two: Making the Cinnamon Rolls

Caramel Sauce
6 tablespoons room temperature butter

1/2 teaspoon salt
1/2 cup brown sugar

Cinnamon Filling
4 tablespoon room temperature butter

1/4 cup sugar
1 tsp ground cinnamon
1/4 tsp freshly grated nutmeg

In a small bowl, cream together the butter, salt and brown sugar to make your caramel sauce.  Spread the mixture evenly over the bottom of a 9 inch square or round pan. Set aside.
Pull a melon sized ball from the prepared dough.  Flour your hands and gently but firmly shape the piece of dough into a smooth ball by stretching and tucking the sides under.  Place on a well floured surface and let the dough rest, covered with a towel to take the chill off while you prepare rest of ingredients.

For the filling, in a small bowl cream together the butter, cinnamon, nutmeg and sugar. Set aside.

Now, roll the dough into an 1/8″ thick rectangle. Spread the filling evenly on the surface. Then roll the dough up, starting with the long side. Take a serrated knife and cut it into 9 even pieces. Place the cut pieces, cut side up, in the prepared pan, lining them up so that they fit evenly. Cover loosely with a towel and let sit until almost double in size, about an hour.

Preheat the oven to 350 degrees. Bake 35-40 minutes in the centre of the oven until golden brown.

Remove from oven and run a knife around the edge of the rolls to loosen them from the side of the pan.  Invert onto a plate.  Let cool a bit before serving, if you can wait that long.

Tuesday, September 14, 2010

Apple Pandowdy


Hi, it's me.  It's been a while.  I have gotten a little off track with my schedule. Life has just gotten in the way a bit.  Back to school, sick child, busy job and how do you get it all done?  Honestly, if I could figure out the answer to that question I would be much more organized, and a millionaire. But I am making a concerted effort to get back into the rhythm of things.

The good news it that I have still found the time to cook. So tonight I am writing about the Apple Pandowdy I hinted at during my last post.  Now, I am not going to pretend I have much experience with this dessert.  In fact, what made me try it was the name...I have always wanted to make an Apple Pandowdy, I just like the sound of it...Apple Pandowdy.


I remember my mother singing "Shoofly Pie and Apple Pandowdy makes your eyes light up and your tummy say howdy". It's an old song, and I don't know where it comes from, but it planted a desire to try those desserts firmly in my brain (I still haven't tried Shoofly Pie, but one day...).

As it turns out it is just a simplified version of an apple pie.  The recipe I tried included raisins and rum, which is what sold me. Also, I really liked the spice combination, this was like my first real "Autumn" dessert of the year.  The apples are cooked in a baking dish with a biscuit or pastry topping, which made for a nice fruit to pastry ratio. I often find regular apple pie too heavy on the pastry side. Overall I would have to say it did make my tummy say howdy...now we'll have to see about Shoofly Pie.


Apple Pandowdy
Adapted from a recipe found in the July 2010 issue of Canadian Living Magazine.

1/2 cup raisins
1/4 cup rum or brandy
8 cups sliced peeled apples
1/3 cup sugar
2 tablespoon flour
1/2 teaspoon ground cinnamon
1/2 teaspoon ground ginger
1/8 teaspoon ground cloves
1/8 teaspoon ground nutmeg
1 egg yolk
2 tablespoons coarse sugar

Single Crust Pastry Recipe:

1-1/4 cups all-purpose flour
1/4 teaspoon salt
1/3 cup shortening
4-5 tablespoons ice cold water


In microwaveable bowl, stir raisins with rum. Microwave on high for 1 minute. Let stand for 15 minutes.
In large bowl, toss together apples, raisins and any remaining rum, sugar, flour, cinnamon, ginger, cloves and nutmeg. Spread in 8-inch baking dish.

To make the pastry, in a small bowl mix the flour and salt. Cut in the shortening with a fork or a pastry cutter until the mixture resembles coarse crumbs. Add the cold water and stir just until the dough starts to pull together.

Turn out onto a well floured surface. Quickly shape into a ball and roll out to a 1/4 inch thickness.Lay rolled pastry over the fruit, draping the excess over the side of the baking dish. Flute the edge of the pastry by pinching it together between your thumb and first finger. Trim off the excess. Mix yolk with 1 tsp water; brush over pastry. Sprinkle with coarse sugar. Cut steam vents in top.

Bake in 400°F oven for 20 minutes. Reduce heat to 350°F and bake until pastry is golden, about 25 minutes. Remove from oven and cool. 

You can break the pastry into 2 inch chuncks with a large spoon, which is the "dowdy" part of pandowdy, but I didn't bother because this happens as you serve it.  It is great warm with a little vanilla ice cream.

Wednesday, September 8, 2010

Peach Cobbler


I spent the weekend at my parent’s house. I always enjoy going up there because my mother likes to cook and experiment with new recipes as much as I do. I come armed with new culinary discoveries and recipes that I want to try and we (without fail) whip up more food than we can possibly eat.


This past weekend we visited the Fifth Town Cheese Factory, made a trip to the farmers market, made a stop at my uncle’s bakeshop, stopped into a local Cider maker, visited another local cheese factory and made two kinds of fruit dessert.

The first dessert we made was a Peach Cobbler. At the farmers market we bought a lovely basket of Ontario peaches, so it seemed appropriate to make a dessert with them. I had actually never made a proper cobbler before this. I am usually a fan of fruit crisps but this time, I decided to try something different.

We found the recipe in Canadian Living magazine, but of course, we had to change it up a bit. We added a bit of nutmeg, just to spice the fruit up a bit and we added buttermilk and a bit of soda to the biscuit recipe, to lighten them up.  The end result was delicious, silky peaches with light and fluffy biscuits.  Perfect with a scoop of vanilla ice cream.  Yum...wait until I tell you about the Apple Pandowdy (I made it just for the name) but that will have to wait for another day...


Peach Cobbler

Adapted from September 2010 issue of Canadian Living

7 cups peaches, sliced and peeled
1/3 cup packed brown sugar
2 tablespoons flour
1 tablespoon lemon juice
1/4 teaspoon salt
1/4 teaspoon nutmeg


Biscuit mixture:

1 1/4 cup flour
1/4 cup butter, cubed

2 tablespoon packed brown sugar
1 1/2 teaspoon baking powder
1/2 teaspoon baking soda
pinch of salt
1/2 cup buttermilk

Preheat the oven to 350 degrees.
In a medium bowl mix together the prepared peach slices with the sugar, flour, lemon juice, salt and nutmeg.  Pour mixture into a 8 inch baking pan. Bake for 20 minutes (without biscuit topping). 
While the peaches are baking, prepare your biscuit mix.  In a second bowl, mix the flour, brown sugar, salt, baking powder and baking soda. Add the butter cubes and mix into the flour mixture until the mixture resembles coarse crumbs. Add the buttermilk and stir together just until combined. 
Once the 20 minutes are up, remove the pan with the peaches from the oven. Drop the biscuit mixture by heaping tablespoon on top of the hot peaches (You should have about 9 tablespoons).
Return the pan to the oven and bake until the biscuits are golden and cooked through on the bottom, about 40 minutes.  Remove from the oven and serve warm with ice cream.

Friday, September 3, 2010

Ricotta Gnocchi with Roasted Tomato Sauce


I have never made homemade pasta.  It is one of those things that I find intimidating.  I have promised myself that I will try to tackle it...one day. It is on my to do list.

I think what keeps me from making it is the fact that I do not have any of the fancy equipment. I know that it will require endless amounts of tedious hand rolling to get a nice thin sheet of pasta. And then I will have to hand cut all of the noodles, ugh. (Did I just admit to being lazy?) 

At any rate, I have made homemade gnocchi.  In fact, I have made it more than once and each time it has turned out beautifully. That's close, it is in the pasta family... it counts. The recipe that I keep going back to is Ricotta Gnocchi.  Truth be told, I am not a huge fan of the regular potato gnocchi.  More often than not I find it doughy and thick and just too starchy.  


But these Ricotta Gnocchi are a whole different story.  They are light and delicate.  They have a very subtle cheese and egg flavour which pairs very nicely with the roasted tomato sauce.  This recipe requires a bit of time and work.  The tomato sauce is the most involved piece, in that you have to roast the tomatoes before you bring the sauce together.

They are worth the effort and while I would not recommend this dish for a weeknight meal it is a great option for a night when you have a little more time and you want something special.  And the best part is you can pat yourself on the back because you have made homemade pasta. (That's right, it counts!)


Ricotta Gnocchi with Roasted Tomato Sauce
adapted from the September 2000 issue of Gourmet Magazine

2 lb plum tomatoes, trimmed and halved lengthwise
1/4 cup olive oil
1/4 cup water
2 tablespoons butter
1 teaspoon salt
1/2 teaspoon pepper
3 large eggs
1 (15-oz) container ricotta
1 cup all-purpose flour
handful of fresh basil leaves
freshly grated Parmesan cheese

Preheat oven to 400°F.
Place tomatoes, cut sides up, in a single layer on a cookie sheet.  Drizzle with olive oil and season well with salt and pepper. Roast about 45 minutes until the skins are browned and wrinkled. Remove from oven and set aside to cool.

While the tomatoes are roasting you can begin to make the gnocchi. Bring a large pot of salted water to a boil.
In a medium bowl, beat together eggs and ricotta with a whisk until well blended. Stir in flour, 1 teaspoon kosher salt, and 1/2 teaspoon pepper until combined. Your batter will be soft.
Use a small ice cream scoop or two small spoons to make the gnocchi. (If using small spoons, teaspoons from you cutlery work best) Scoop up a rounded spoon of batter, then use second spoon to scoop mixture off and into boiling water. Make 9 more gnocchi, scooping and dropping .into the water as you go.  The water should be at a good rolling boil when you start.
Simmer briskly until gnocchi are just firm in centre and cooked through, about 5 minutes. Transfer with a slotted spoon to a platter and cool, covered with damp paper towel. Continue making gnocchi in batches of 10.
 
When tomatoes are cool enough to handle, give them a quick pulse in a food processor to break them down. Then scrape the pulp, skins, seeds, and any juices through a fine sieve set over saucepan. Press on solids in sieve to extract juices. Discard skins and seeds.
Stir 1/4 cup water into tomatoes and bring to a simmer over low heat. While tomatoes are coming to a simmer, melt 2 tablespoons butter in a 12-inch nonstick skillet over moderate heat. Sauté gnocchi, turning gently, until heated through and lightly browned, about 4 to 5 minutes.
Season gnocchi with salt and pepper. Serve with warm tomato sauce, fresh basil and a good shaving of  Parmesan.

Tuesday, August 31, 2010

Homemade Granola Bars


Next week is back to school and that means packing school snacks. Everyday…snacks. I’m sure I’m not the only parent who gets stressed out just thinking about doing this every day for the next 10 months. It’s no easy task coming up with a healthy option while still satisfying the daily whims of a 5 year old. Sad to say, but as the summer started to draw to a close the first thing I started to think about was…”Damn, I’m going to have to start preparing snacks again.” (Thank goodness I’m not at the lunch stage yet, I’m sure that’s even worse.)

It will come as no surprise that I am not a big fan of the pre-made snacks available at the grocery store. I have yet to understand the appeal of cheese that you can pull apart (and all of the individual wrapping makes me nuts) and I really don’t like the sugary granola bars and bear claws, etc, etc.


Last year I did struggle after awhile to come up with good snacks that my daughter would eat and that did not take forever to get together. She usually got some cheese and fruit or a homemade muffin or some cut up vegetables.  I'd be fine for a while and then I would run out of ideas.

This year I’m back at work so I have even less time to get something together. That is why I am making an attempt to get organized up front. One of the things I did this week was make homemade granola bars. Now you may be saying, “Come on, that isn’t a quick snack solution”, but I promise you it is.

I can make a whole pan of them in about a half and hour and then after I cut them into bars I keep them in an airtight container in the fridge and they are good for weeks. You can make this recipe as either loose granola or you can cut it into bars.  If your school does not allow nut snacks (as most don't) then just omit the nuts and add seeds such as pumpkin, sunflower and sesame.  I add chocolate chips and dried cranberries to mine and the kids love them…so that’s a start. Now all I have to do is come up with something for the next 8 months.


Granola Bars

Adapted from Ina Garten

I have adapted the original recipe to suit my taste, which means I substituted maple syrup for the sugar, eliminated the oil and I added whole almonds and chocolate chips. Granola is pretty forgiving so you can change the recipe to suit your tastes as well.  Have fun with it.

2 cups old-fashioned oatmeal
1 cup almonds
1 cup shredded unsweetened coconut
1/2 cup toasted wheat germ
1/2 cup maple syrup
1/2 teaspoon pure vanilla extract
1 1/2 cup dried fruit, or a mix of dried fruit, nuts, chocolate, whatever you like (I used cranberries and chocolate chips)

Preheat your oven to 350°F.

Toss the oatmeal, almonds, and coconut together on a cookie sheet and bake for 10 to 12 minutes, stirring occasionally, until lightly browned. Transfer the mixture to a large mixing bowl and stir in the wheat germ. Reduce the oven temperature to 300°F. Line your cookie sheet with parchment paper

While the mixture is still warm, stir in the maple syrup and vanilla until the mixture is well coated. Add the cranberries and toss to combine.  Now add the chocolate chips and toss quickly as they will begin to melt.

Pour the mixture onto your prepared baking dish and press it down with you hand or a spatula. It may only cover half of the cookie sheet, which is fine, just make sure that the granola is pressed together well ( if you are going to make loose granola don't worry about this part).

Bake for 25 to 30 minutes, until light golden brown. Cool for 2 to 3 hours before cutting into squares.

You can store the bars in the freezer for a couple of weeks. They stay crisp this way, if you keep them at room temperature they will soften up.

Sunday, August 29, 2010

The Toronto FRESH Event


I am late with this post. I have been trying to write it for two days. As I have mentioned, I have spent the last three months organizing an event in the Toronto area. It was a two week series of workshops, dinners, tastings and classes which culminated in the Toronto premiere screening of the documentary Fresh last Thursday night.


Fresh is a new documentary by Ana Joanes that examines the consequences of our industrial food system and offers a practical alternative for how we grow, buy and eat our food. Some of the people featured in the film are urban farmer and activist, Will Allen, sustainable farmer and entrepreneur, Joel Salatin (made famous by Michael Pollan’s book, The Omnivore’s Dilemma) and supermarket owner, David Ball, who challenges our Walmart dominated society.

I wanted to write on Thursday night right after the screening, and then I tried again yesterday, but I am having a hard time. I am finding it hard to sum up the evening and the finale of the Toronto FRESH Event.


Was it a success? Yes! Did it meet my expectations? Yes and then some. I think the reason why I am having such a hard time is that once it was over I started to think about what should happen next.

The movie is only being distributed through grass-roots community driven initiatives with the intention of sparking local activity. Thursday's screening was followed by a panel discussion with some of Toronto’s leading food activists. The main topic of discussion was what could be done in our area to advance the cause for local, sustainable and accessible food resources. As you would expect, there was no easy answer, no single action that could satisfy that question. In fact, what struck me the most was how many different initiatives are underway and how they are all moving towards the same goal.

In attendance were urban farmers, community activists, teachers, chefs, city planners all looking at the issue from their own point of view. Possibly the most heartening aspect of this movement is that it can be advanced through so many different avenues, most likely because it affects so many different aspects of our society.


Food is not just fuel. Where it comes from, how it is produced, who can buy it and how it gets to your table impacts so many areas of our lives and our society. There are environmental, health-care, economic and social implications to our choices. No one person can tackle them all. For me the good news is that there are a lot of dedicated people in the Toronto area and a lot of initiatives already underway.

So then the question comes, where do I fit in to all of this and how do I keep active? I am so pleased I had a chance to screen this movie and be part of an event that provided a forum for discussion and communion but I want to figure out how to keep going.

Then my neighbour, Lindsay, came up to me yesterday. She had seen the film on Thursday and was clearly moved by the experience. She started to tell me what she had done already, how she had contacted friends and how she had made different choices when she went shopping the next day. She helped me to remember that small acts and individual choices can have a big impact.

Lindsay and I are continuing the discussion. We are looking at what we can do in our own neighbourhood, including things as simple as getting together with our neighbours over a meal and sharing the experience of good food.

So that is how I will start. I am committed to continuing with the larger advocacy groups and with the activists that I met in the course of organizing this event. But, I will also value the small changes that I can make at home and the power of actions I take right in my own neighbourhood and on my own street.

If you want to host a screening in your own area contact the people at freshthemovie.com. At the very least I think you will be amazed by the power of food to bring people together, to spark discussion and build community bonds. It is a very rewarding experience to be a part of something like that.

Tuesday, August 24, 2010

Cornbread


I had a really busy weekend.  I have been working a lot and working weekends so I have not had a lot of time to bake. When I had this weekend off I decided to make up for lost time. I made homemade gnocchi, homemade granola, scallion pancakes, an amazing steak sandwich and cornbread. 

When I sat down to do this post I thought what, out of all of those great recipes, am I going to share tonight?  I decided on the Cornbread.  Now, you may think out of all of my choices that this is the most mundane offering but I say au contraire


This Cornbread is just a beautiful cake, real comfort food.  That's actually why I made it.  I woke up Saturday morning planning to do all of this cooking and baking but first I wanted something comforting for breakfast.  When I was little my mother would make Cornbread and we would eat it hot out of the oven drenched in butter and maple syrup.  That's what I felt like having to start my day... something warm that reminded me of home, of being a kid, of mom in the kitchen. 


The recipe I use is very simple. It is made in a cast iron pan which gives the cake a nice crisp outside with a moist and dense centre, perfect for a good dousing of maple syrup.  Of course that is not the only way you can eat it.  I make it for chili and I add cheese and jalapenos or I make it to go with pea soup or stew.  You can even split it and use it to make Strawberry Shortcake. It works so many different ways, but if you haven't tried it with maple syrup then make that a priority. Because then you will have an idea of what home feels like to me. 


Cornbread
This recipe is from Michael Smith's Chef at Home series

½ cup butter

1½ cups milk
1½ cups coarse cornmeal
½ cup brown sugar
3 large eggs
1 teaspoon baking powder
¼ teaspoon salt
1 teaspoon vegetable oil for greasing the skillet

Preheat oven to 400 degrees. Place an 8-inch cast iron skillet in the oven to preheat.

Combine the butter, milk, cornmeal and brown sugar in a small saucepan. Bring to a slow, steady simmer over medium heat and whisk for a few minutes until thickened. Remove from heat and let cool slightly while you prepare the rest of the ingredients.
Add eggs, baking powder and salt to a medium bowl and whisk lightly. Add to the cornmeal mixture and stir until well combined.
Oil cast iron skillet and pour in batter. Bake for 20-25 minutes until the cornbread is golden around the edges and cooked through.
Remove from oven and cool on a baking rack for 10 minutes.  Turn the cornbread out onto a platter and serve in wedges while still warm.

Friday, August 20, 2010

Burnt Sugar Cake


I’m staring at the pictures of this cake and I am trying to think of something to write. I want to give you some insight into the cake making process or give you a reason why you should make this cake, but it all seems so unnecessary. I mean look at it. I just don’t know what to say. Do you really need a reason?

Burnt Sugar Cake. I just can’t think of anything that sounds better than that. I love the smell of caramelizing sugar, that sweet burnt smell, it is just intoxicating. So imagine a cake made from caramelized sugar syrup. It is over the top decadent.


In fact, believe it or not, I had to tone down the richness of the cake (and the burnt sugar icing) with a chocolate ganache glaze. (Honestly, it needed the bitterness of the chocolate to cut down on the richness of the caramel flavour…I’m not just making up an excuse to add chocolate.)

I have seen this cake pop up on a number of sites but the original recipe comes from Nancie McDermott’s Southern Cakes. This cookbook is full of amazing cakes, but this one it probably my favourite. It is a dense moist cake and the flavour really stands out. It is so much better than a basic white cake. So take a good look and then make it yourself, you will not be disappointed.


Burnt Sugar Cake

from Nancie McDermott's Southern Cakes

for the caramel syrup:
 
1 cup sugar
1 cup boiling water

Heat the sugar in a heavy skillet over a medium-low heat until the sugar melts into a clear brown caramel syrup. Resist the urge to stir until the sugar has begun to melt.  Watch carefully as the sugar can quickly change from deep brown to burnt. Gradually add the boiling water, pouring it down the sides of the pan. Be very careful as it will bubble up.
Cook, stirring constantly, until the water combines with the syrup and becomes a deep brown. Remove from the heat and set aside to cool. You will end up with about 1 3/4 cups of caramel syrup.


for the cake:

3 cups all purpose flour
1 tbsp baking powder
½ tsp salt
1 tsp vanilla extract
1 cup milk
1 cup butter
1¾ cups sugar
4 eggs
½ cup Caramel Syrup

Preheat the oven to 350F. Grease two nine inch cake pans and line the bottom with parchment paper. Grease the paper again and dust lightly with flour.
In a medium bowl, whisk together the flour, baking powder and salt. Set aside. In a separate small bowl stir the vanilla into the milk.
With your stand mixer or with an electric beater, beat the butter and the sugar at high speed for 2 - 3 minutes, until soft and fluffy.


Add the eggs, one at a time, beating well between each addition. Pour in half a cup of the caramel syrup and beat well. Add a third of the flour mixture and about half of the milk, beating at a low speed, until just incorporated. Mix in another third of the flour and the rest of the milk. Finally, add the remaining flour.
Divide the batter between your prepared pans. Bake for 20 to 25 minutes until the cakes are golden brown and begin to pull away from the sides of the pan. Let the cakes cool in the pans on a wire rack for 15 minutes. Turn out the cakes into the wire rack to cool completely.


Caramel Icing

3¾ cups confectioners sugar
½ cup Caramel Syrup
¼ cup butter
1 tsp vanilla extract
2 - 4 tablespoons milk

Combine the confectioners sugar, the caramel syrup, butter, and vanilla. Beat at medium speed for 2 to 3 minutes, scraping down the bowl. Add 2 tablespoons of milk and continue beating until the frosting is smooth and easy to spread. Add a little more sugar if it is thin, and a little more milk if it is too thick.

Chocolate Ganache

1/2 cup heavy cream
4 ounces bittersweet chocolate, chopped
1/2 tablespoon light corn syrup

Place the chopped chocolate and corn syrup in a small bowl. Bring the heavy cream to a boil. Remove from heat and add pour over the chocolate and light corn syrup. Whisk until smooth.
To assemble the cake:

Place once layer on a cake plate.  Spread with a layer of the caramel frosting and a little of the ganache.  Place the second layer on top. Spread the top with a layer of the caramel icing and pour the ganache over the top so that it runs down the sides.

Tuesday, August 17, 2010

Potato Salad...a new way


Most times I find that simple is better, especially when you are cooking with fresh produce.

For as long as I can remember I have been eating and making the traditional Potato Salad. I have used essentially the same recipe for more years that I care to contemplate. Sure, sometimes I mix it up, I add pickles or dill or eggs, but in the end this salad always involves a heavy dose of mayonnaise and a laundry list of other ingredients…mustard, spices, onions, and on and on.


But recently my neighbor and good friend, Treva, introduced me to a new way to make Potato Salad. This is a recipe passed down from her mother-in-law, which is the way most of the best recipes circulate, from friend to friend, relation to relation.

It is so easy to make that it hardly feels like any effort at all. Just steam some potatoes and then when they are still warm toss them with plenty of olive oil, vinegar and salt and pepper. When the potatoes have cooled toss in a good handful of chopped green onion. That’s it.

I especially like this recipe because instead of mayonnaise I taste potatoes, spring onions, and a lovely light vinaigrette. You could add fresh herbs…parsley would be good, as would or dill or basil, but I like it the way it is.

I’m sure I will make the traditional salad again, some day, but for now I am sticking with simple and delicious.


Potato and Green Onion Salad

1 lb of small new potatoes
1/4 cup good olive oil
3 tablespoons white wine vinegar
1/2 cup sliced green onions
salt and pepper to taste

Steam your potatoes until they are tender.
Move to a medium sized bowl and toss with the olive oil and vinegar. Season with salt and pepper to taste. Once they have cooled toss in the sliced onions and serve.  This salad is great room temperature or cold.  If you make it a day in advance the dressing has a chance to absorb into the potatoes. 

Thursday, August 12, 2010

Butter Tarts


I made something quintessentially Canadian tonight.  I made Butter Tarts.
I was going through my recipe box trying to think of something to make for this evenings post when I came across my recipe.  I haven't made Butter Tarts for a while so they caught my attention. 

Truth be told, my very favourite ones come from my uncle's bakeshop. But as that is a 2 hour drive, I decided to make these instead.


Don't get me wrong, these are good, really good. The reason why I like my uncle's better is that he has a special machine that he uses to stamp out the dough nice and thin.  Try as I might, I can never get my pastry as thin and for me a good butter tart is all about the filling.

But I was glad to have these when dessert time came around and believe me no one else was complaining either. The filling in these tarts is perfect, smooth and rich with a good hit of maple flavour. If you cook them just to the 18 minute mark the filling stays runny which is, in my mind, the best way to have a Butter Tart. And if you are Canadian then you know by saying that I have just waded into the great Butter Tart debate...runny filling or not, but lets not get into that now. Let's just have another tart.


Butter Tarts

for the filling:

1/2 cup room temperature butter
1 cup brown sugar
1/2 cup corn syrup
1/2 cup maple syrup
2 eggs
1 teaspoon vanilla
a few drops of lemon juice
pinch of salt


for the pastry:


1-1/4 cups all-purpose flour
1/4 teaspoon salt
1/3 cup shortening
4-5 tablespoons ice cold water

Preheat the oven to 375 degrees. Make the pastry first. In a small bowl mix the flour and salt. Cut in the shortening with a fork or a pastry cutter until the mixture resembles coarse crumbs. Add the cold water and stir just until the dough starts to pull together.

Turn out onto a well floured surface. Quickly shape into a ball and roll out to a 1/4 inch thickness. Cut into 4 inch circles and fit the cut pastry into the cups of a muffin tin.
In a medium bowl cream together all of the filling ingredients until smooth.  Fill the prepared cups 2/3 full. Bake for 18-20 minutes. Remove from oven and cool on a wire rack for 10 minutes.  Remove from muffin tin and let stand until completely cool.

Butter on Foodista

Tuesday, August 10, 2010

Fried Zucchini Blossoms


Do you remember this picture? It is the zucchini plant I showed you a couple of weeks ago, the one that is taking over my front yard. Well, as it turns out, while I have been anxiously awaiting my first zucchini, I have been missing out on the bounty that this plant has been providing for weeks now. Namely these…


Zucchini blossoms. For years I have heard how good they are, but I have never had the chance to try them (they are not easy to come by at the grocery store). So when my zucchini plant started to blossom I...ignored them...it didn't really cross my mind to do anything with them.

Then the other day one of my work colleagues was munching on fried zucchini flowers during lunch. She let me try one and it was good, but as it was a cold leftover I was not overwhelmed. When I told her my zucchini plant was full of blossoms but I hadn't thought to do anything with them she was appalled (really she was, I thought it was kind of a strong reaction, but now I see why).

So, shamed, I went home and picked the flowers. I dutifully found a recipe and made them. They were good...so good! Honestly, one of the best things I have had in a long time.  The batter was nice and crisp and the cheese filling was great but the flowers, they were amazing.  It is hard to describe until you taste them.  They are soft and delicate, as you would expect a flower to be, but still distinctive and flavourful. I'm hooked. 

When I came home from work today I eyed my zucchini plant, willing it to produce just a few more of these gems...I don't want to think I have let the whole season go by with just one taste. 


Pan-fried Zucchini Flowers
adapted from Food and Style


for the batter

1 cup flour
1/2 teaspoon sea salt
3/4 cup warm water
1 large egg
1/4 cup beer


for the stuffing

1 egg, lightly beaten
1/2 cup fresh ricotta cheese
1 small shallot, finely chopped
1 tablespoon finely chopped herbs (Use whatever combination you like.  I used Italian parsley, thyme and oregano)
1/4 teaspoon sea salt
freshly ground pepper to taste
10-15 fresh zucchini flowers
1/2 cup olive oil for pan-frying
Mix the flour, salt and warm water in a small bowl. This is your batter. It should sit for at least a half an hour to rest, so set it aside while you prepare the flowers and stuffing.
In a second small bowl mix the egg, ricotta, shallot, herbs, salt and pepper until well blended and set aside.
To prepare the flowers - gently make a slit lengthwise in each flower and remove the stamen. Spoon a small amount of the stuffing (about 1 teaspoon) into the base of each flower and gently twist the petals so that the stuffing is held inside the flower. Place on a baking rack.
Once all of the flowers are prepared, add the egg and the beer to your batter.  Mix until smooth.
Heat a large heavy-bottom skillet to high heat. Add the oil. When the oil is hot, dip each flower in the batter and add them to the pan. Sauté for 2 to 3 minutes until golden. Flip the flowers and continue to sauté for 1 to 2 minutes until golden. Repeat until all flowers have been used, reducing the heat to medium-high when the pan is very hot so the oil doesn’t burn. Serve immediately.
Related Posts Plugin for WordPress, Blogger...