Thursday, December 29, 2011

Turkey Croquettes


If you are like me it is now day four of "what do I do with all the turkey leftovers". I was the host this year for Christmas Dinner. My parents, my sisters and their children all gathered at our new home in Hamilton for the "roast beast". I enjoy playing host, so I was excited to have everyone here.

In honour of the occasion I ordered a lovely 17 lb turkey from Julia's Poultry and Eggs at the Hamilton Farmer's Market. It was perfect, antibiotic and hormone free, locally grown and delicious.  However, despite everyone's best efforts, we were still left with an enormous amount of leftover turkey (as well as mashed potatoes, sweet potatoes, stuffing, etc, etc).


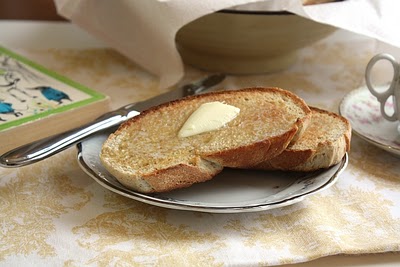
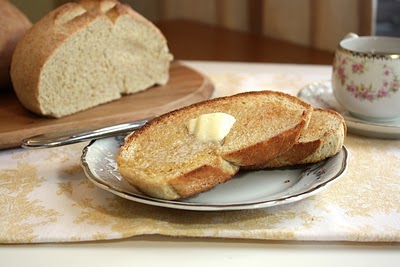
So, what to do with all of this food now that there is just the four of us to finish it off? Honestly, I was not in the mood for stew and I am NOT a fan of Turkey Tetrazzini. On the first night we did Hot Turkey Sandwiches, which is just some of the leftover turkey simmered in the leftover gravy and served over a slice of toast.  It was delicious, but did not completely solve the leftover dilemma as I was still left with a good pound of turkey. 

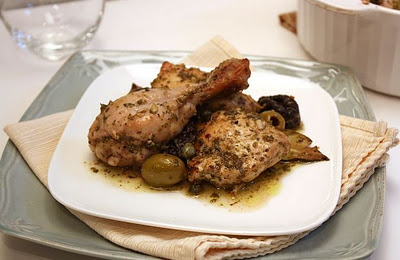
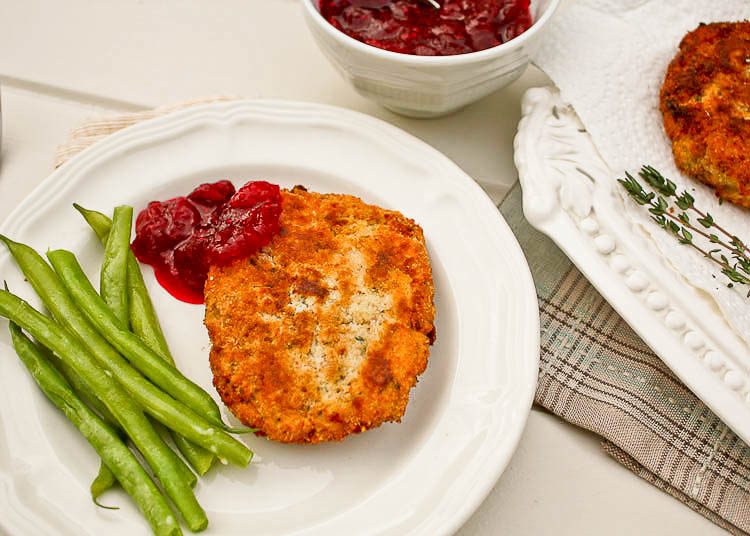
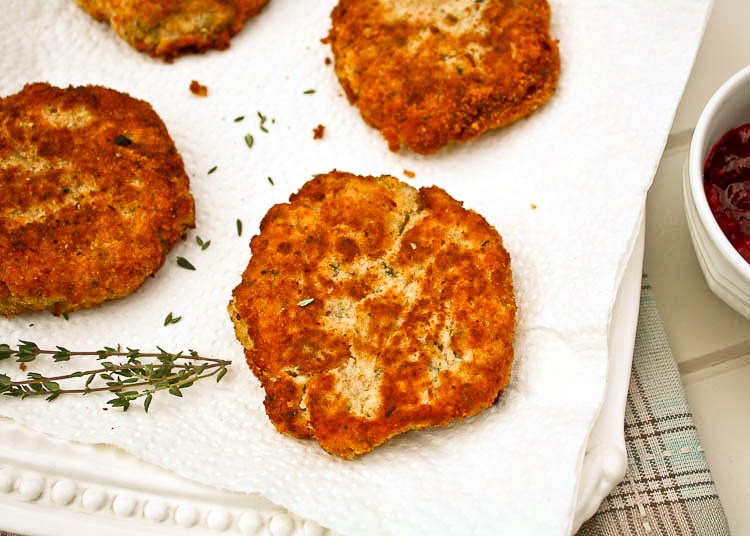
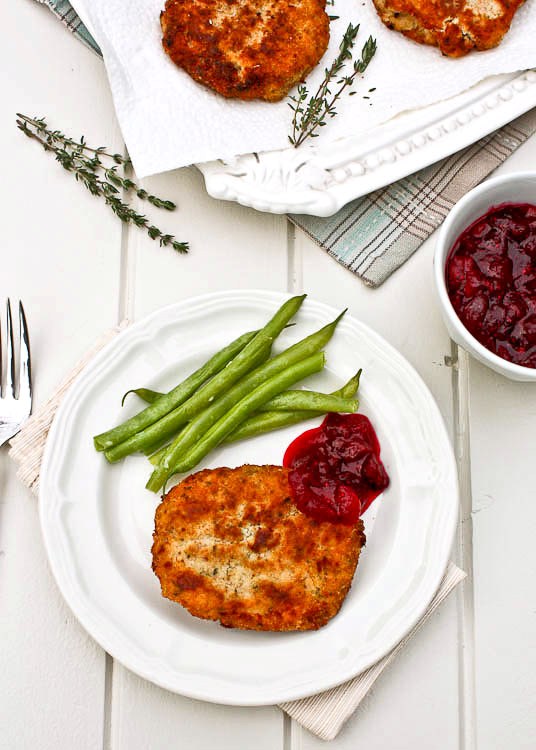
A quick search led me to the idea of making Turkey Croquettes.  I wanted something easy and a little different from the norm. Plus, I was able to use up some of the other leftovers in the recipe, so it was a great solution. The croquettes were lovely. Moist on the inside with a nice crisp outer coating of breadcrumbs.  Served with cranberry sauce and a few steamed green beans it was a perfect light dinner.

This recipe would work well with any number of substitutions. You could use leftover roast chicken, duck or pork or try it with salmon or shrimp.  I would just change the seasoning to suit the meat, like rosemary for the pork or dill for salmon or shrimp. I would also not use sweet potatoes with fish (but that's just me).  The possibilities are endless.

Now, if I could only figure out what to do with the rest of the turkey...hmm, maybe a curry.


Turkey Croquettes
This recipe is adapted from Martha Stewart.

Prep time: 20 minutes
Cook time: 20 minutes
Total time: 40 minutes
Yield: 6 - 8 croquettes


Ingredients
  • 2 cups finely diced or shredded cooked turkey
  • 1 medium onion, finely diced
  • 2 tablespoons olive oil
  • 1 teaspoon dried thyme (or 2 teaspoons of fresh)
  • 1 teaspoon chopped fresh sage
  • 1/4 cup half and half cream
  • 1 teaspoon kosher salt
  • 1 teaspoon freshly ground pepper
  • 1 cup leftover mashed potatoes
  • 1/2 cup leftover mashed sweet potato
  • 1 egg
  • 1/4 cup all purpose flour
  • 1 1/2 cups breadcrumbs, season with salt and pepper to taste
  • vegetable oil for frying

Cooking Directions
  1. In a large skillet over medium-high heat saute the onions in the 2 tablespoons of olive oil. Cook for 2 - 3 minutes or until the onions are translucent. Stir in the herbs and salt and pepper and cook for 1 minute more. Stir in the turkey and cream, and cook until liquid evaporates, about 1 minute.
  2. Transfer to a large bowl, and let cool for 15 minutes. Add the potatoes, flour, and egg and stir until combined.
  3. Take about 2 tablespoons of the turkey mixture and gently work it into a flat disk with your hands. Coat with the breadcrumbs and arrange, in a single layer, on a platter or baking sheet. Refrigerate for about 10 minutes.
  4. Heat 1/4 inch of oil in a deep skillet over medium heat. Working in batches, (about 2 - 3 croquettes at a time) cook croquettes in a single layer until golden brown, about 2 minutes per side.
  5. Transfer to paper towels to drain. Serve immediately.

Wednesday, December 21, 2011

Shortbread Cookies


Come Christmas Eve we will leave a plate of cookies out for Santa. Now, I 'm sure this isn't a revelation to you. Everyone knows that Santa likes a little snack after he has filled the stockings. So I am quite sure this ritual will be happening all over town.

But that doesn't mean we can't stop to talk about this a minute. Because I've thought a lot about it. Look, you're busy, Santa's busy. I get it, we need to keep this simple. Plus, he has so many houses to visit, I think it is best to keep it light. He doesn't want to be weighed down, over-stuffed by the end of the evening. He just needs a quick bite, a bit of milk and he's on his way.


So for me, that means Shortbread Cookies. They look gorgeous, pale golden brown with a splash of red. Crisp, buttery and delicious in their simplicity. They are a classic, just like Christmas on a plate.

These are traditional Scottish Shortbreads. No corn starch, no icing sugar; they are the real deal. Just three ingredients: butter, brown sugar, flour and that's it. You can press the dough into a shallow dish to bake and cut into squares or you can roll it out, as I did, and cut them into whatever shape you like. Add a bit of glace cherries for colour and you have cookie perfection.

Trust me. Santa will love you for it. You might even find a little extra in your stocking this year! (And don't forget to leave a little something out for his reindeer.)


Shortbread Cookies
Prep time: 10 minutes
Cook time: 10 minutes
Total time: 20 minutes
Yield: 2 dozen cookies

Ingredients
  • 2 1/2 cups all purpose flour
  • 1 cup room temperature butter
  • 1/2 cup brown sugar
Cooking Directions
  1. Preheat the oven to 300 degrees.
  2. In a medium bowl, cream the butter and sugar. Add the flour and mix well until incorporated into a dry stiff dough. It is easier to do this in a stand mixer as the dough takes a bit of mixing to come together, but it is more than possible to do by hand, it just takes a bit of elbow grease.
  3. If you want to bake into squares press the dough into a 9 inch square cake pan lined with parchment. You can score the top or prick with a fork in a decorative patter. Bake 20 -25 minutes until light golden and just set in the middle. Remove from the oven and turn the cookie sheet out once cooled. Cut into squares.
  4. If you are cutting the dough into shapes, dust a clean cooking surface with flour. Form the dough into a ball and roll out to a 1/4 inch thickness. The dough is dry so it will crack when you roll it, don't worry, just press it back together and keep going.
  5. Cut with your favourite cookie cutter and decorate with glace cherries or silver dragees. Transfer to a cookie sheet, keeping cookies an inch apart.
  6. Bake in the centre of the oven for 10 - 12 minutes or until the edges are golden. Remove, cool and enjoy!

Sunday, December 18, 2011

Fig Pistachio Oatmeal Cookies


This is something I whipped up last week.  I was in the kitchen getting lunch ready for my little one when I all of a sudden had the urge to make Oatmeal Cookies.  Yes, that really does happen to me. I will be carrying on like normal, going about my day and BANG I am overpowered by some kind of culinary craving.  I don't know what set me off this time but I all of a sudden I needed a warm Oatmeal Cookie.

Let me be clear though, I did not want just any Oatmeal Cookie, I wanted something little out of the ordinary.  I needed a cookie with a little spice and a hint of the exotic. I needed an Oatmeal Cookie that would capture the best flavours of this holiday season.


And so I ended up rooting through my pantry, trying to design a combination that will satisfy my craving. I started with the familiar; comforting oatmeal, rich brown sugar and a touch of whole wheat flour for a hint of nutty flavour as the base.

Then I began to layer in the more exotic flavours. For texture and intense sweetness I added dried figs and paired them with buttery pistachios.  Next, I added cinnamon, ground coriander seed and a bit of orange zest.  In the end I was quite happy with the result.  The cookies were chewy and soft, just as a proper Oatmeal Cookie should be and the combination of flavours seemed perfect for the Holiday Season.  Better yet, my eldest daughter said they were the best cookies ever and she was really glad I am her mom!  So happy I listened to my cravings!


Fig Pistachio Oatmeal Cookies
Prep time: 10 minutes
Cook time: 10 minutes
Total time: 20 minutes
Yield: 3 dozen

Ingredients
  • 1 1/2 cups all purpose flour
  • 1/2 cup whole wheat flour
  • 1 1/2 cups rolled oats
  • 1 cup butter
  • 1 1/3 cup brown sugar
  • 1/2 teaspoon baking soda
  • 1/4 teaspoon salt
  • 1/2 teaspoon ground cinnamon
  • 1/4 teaspoon ground coriander
  • 2 eggs
  • 2 teaspoons pure vanilla extract
  • 1 teaspoon orange zest
  • 1 cup chopped dried figs
  • 3/4 cups shelled, salted pistachios
Cooking Directions
  1. Preheat oven to 375 degrees.
  2. In a medium bowl or in a stand mixer, cream together sugar and butter. Add eggs, orange zest and vanilla and mix until combined.
  3. In a separate small bowl mix together all the dry ingredients including the spices. Add to the butter, sugar and egg mixture. Mix until well combined. Stir in the chopped figs and pistachios.
  4. Scoop about one heaping tablespoon of batter per cookie. Roll slightly and place on a cookie sheet lined with parchment or a Silpat sheet. Flatten the dough a bit with the tines of a fork. Leave about 2 inches of space between each cookie on the cookie sheet.
  5. Bake in the centre of the oven for 10 - 12 minutes or until the centres are just set and the edges are brown.
  6. Remove the cookies to a cooling rack. Let them cool as long as you can and then enjoy!

Thursday, December 8, 2011

Spice Cake


This is a story about a cake. It is also a story about family and memory and love. 

I often mention my Grandfather.  He had a tremendous influence on me. Memories of the time I spent with him, working in his bakeshop, listening to his stories, watching and learning, are a touchstone in my life. But today, this story is about my Grandmother. 

When I think of her I think of early weekend mornings, lying in bed listening to the sounds of pots and pans, cupboard doors being opened and banging closed, as she began the task of making breakfast for a house full of people. I would stay there, under the covers, waiting for the the smell of bacon and toast and coffee to reach me.  Going downstairs I would find a table laden with warm sweet buns from the shop, eggs with homemade chili sauce, bacon, sausage and buttered toast just waiting for her homemade jam. 

I think of coming in the back door and being careful, as I removed my coat and shoes, to avoid the large earthenware pot that sat in the back cupboard and contained cucumbers and onions from her garden. They sat immersed in the sweet brine that would slowly turn them into the bread and butter pickles I loved so much.

I think of wanting a snack and going downstairs to fetch a jar of her pickled beets, or spicy dills, or pickled beans from the cold room.  I think of the marigolds she loved at the front of her house, of the fact that she always had chocolate hidden in the sideboard among the good dishes.


And I think of this cake.  This is the first recipe I ever got from my Grandmother.  I can't make it without thinking of the afternoon I first had it at her house. We were alone, which was a rare treat, and we sat at the table and talked and enjoyed this cake.  It's a simple memory but for some reason that moment stayed with me and I often think of that afternoon, that quiet time with my Grandmother and that talk.

So now this cake is my husband's favourite and it is what he has on his birthday every year.  It is also one of the first cakes I made with my children and it is special to me for those reasons as well.  And maybe one day, when my children think back to times spent with me they will think of these memories, of their father's birthdays and of helping me in the kitchen.


Spice Cake

Prep time: 15 minutes

Cook time: 45 minutes
Total time: 1 hour
Yield: 9 inch cake

Ingredients
  • 1 cup oatmeal
  • 1 1/2 cup boiling water
  • 1 cup room temperature butter
  • 1 cup granulated sugar
  • 1 cup brown sugar
  • eggs, beaten
  • 1/2 cup all purpose flour
  • 1 teaspoon baking soda
  • 1 teaspoon cinnamon
  • 1 teaspoon vanilla
  • 1/2 teaspoon salt
Topping
  • 6 tablespoons butter
  • 1/2 cup brown sugar
  • 1 cup unsweetened shredded coconut
  • 1/2 cup chopped pecans
  • 3 tablespoons sweetened condensed milk
  • 1 teaspoon vanilla

Cooking Directions
  1. Preheat oven to 350 degrees. Butter a 9 inch cake or springform pan and line with parchment.
  2. In a small bowl, combine oatmeal and boiling water. Set aside to cool.
  3. In a medium bowl cream together the butter and sugars. Add the eggs and mix until combined. Stir in the vanilla.
  4. Place the dry ingredients in a second medium bowl and whisk until they are well combined. Alternate adding the cooled oatmeal mixture and the dry ingredients into the butter, sugar and egg mixture. Add half of each starting with the oatmeal and ending with the dry ingredients. Repeat until all ingredients are incorporated. Mix until just combined.
  5. Pour the batter into the prepared pan and bake in the centre of the oven for 45 - 55 minutes or until a toothpick inserted near the centre of the cake come out with a few moist crumbs.
  6. Meanwhile, in a small bowl, combine all of the ingredients for the topping. Spread over the top of the cake while still warm. Place under the broiler for 3 - 5 minutes watching closely that the top is browned and not burnt.
  7. Let the cake cool. If you have used a springform pan, loosen the sides with a knife and remove the collar before serving. If not, serve from the cake pan. (this is the reason for the parchment, it will make serving the cake easier. Enjoy!


Friday, December 2, 2011

Chocolate Bread Pudding with Bourbon Butterscotch Sauce


A couple of weeks ago my darling eldest daughter broke her arm at school. Not long after I dropped her off I got the call that every parent dreads, telling me that that my child was hurt. I rushed back to the school and took her over to the hospital and even though I knew she was hurt I was in no way prepared for the extent of her injuries.

A simple mis-step and fall in the playground led to three days in the hospital, surgery, pins placed in both bones in her forearm, three months in a full arm cast and another surgery to come. It was a terrible thing to see my child go through. She was hurt and scared in a way I never want to witness again.

But, strangely enough, this incident reassured me. Mostly because I saw what a tough and capable little person my daughter is even at the tender age of six. She handled the stress and pain of the situation with tremendous dignity. She communicated with the medical staff, accepted what needed to happen to get her arm fixed and stayed calm throughout.

I came away from it all with an enormous sense of pride. She amazed everyone with her strength, her determination and her ability to just get back to a normal routine as quickly as possible. She was brave and strong in a way I never thought possible. I am just in awe of how she adapted to a difficult situation and moved forward. It has been a lesson and it makes me re-examine how I should approach life's setbacks and mishaps.

So now things have pretty much gotten back to normal. She is back at school and I am in the thick of holiday preparations: planning, shopping, baking, etc, etc. But I feel like we are due for something a little comforting. Something that will make me take a moment to slow down, relax and enjoy the now.


Today, that comfort comes in the form of Chocolate Bread Pudding.  It is warm and homey but still special enough to feel like an indulgent treat, so it fits the bill perfectly.  And, just because I am never satisfied leaving well enough alone, I served it with a generous dose of Bourbon Butterscotch Sauce. Decadent!


Chocolate Bread Pudding
This recipe is adapted from Paula Deen. It makes quite a lot but the recipe can easily be cut in half if you are serving a smaller group.

Prep time: 30 minutes
Cook time: 1 hour
Total time: 1 hour 30 minutes
Yield: serves 10 - 12 people

Ingredients
  • 15 cups stale Challah or egg bread, cut into 1 inch cubes
  • 3 cups milk
  • 1/4 cup heavy cream
  • 1 cup granulated sugar
  • 1 cup brown sugar
  • 1/4 cup unsweetened cocoa powder
  • 1 tablespoon vanilla extract
  • 2 teaspoons almond extract
  • pinch salt
  • 6 eggs, lightly beaten
  • 1 cup semi-sweet chocolate chips
Directions
  1. Preheat the oven to 325 degrees F.
  2. Lightly grease a 13 by 9-inch baking dish. Place the bread cubes in the baking dish.
  3. In a large bowl, whisk together all remaining ingredients, except the chocolate chips. Whisk until the mixture is smooth and a uniform consistency.
  4. Pour the mixture evenly over the bread cubes. Sprinkle the chocolate chips over the surface of the bread and egg mixture. Give everything a light stir to distribute the chocolate chips throughout and to ensure all the bread is evenly coated.
  5. Let stand, stirring occasionally, for at least 20 minutes, or until the bread has absorbed most of the milk mixture.
  6. Bake the pudding for 1 hour, or until set (a knife inserted into the center of the pudding should come out clean).
  7. Serve the pudding warm or at room temperature. You can add the butterscotch sauce if you like or serve with a bit of whipped cream. Enjoy!

Bourbon Butterscotch Sauce
 
Prep time: 5 minutes
Cook time: 10 minutes
Total time: 15 minutes
Yield: serves 8 - 10

Ingredients
  • 1 1/4 cup brown sugar
  • 1/2 cup room temperature butter
  • 1/2 cup whipping cream
  • 1/4 cup bourbon
  • 1 teaspoon vanilla
Directions
  1. Using a medium sized saute pan, whisk sugar and butter over medium heat until the butter melts. Whisk in cream and stir until the sugar dissolves and the sauce is smooth and thick. Take the pan off the heat and whisk in the bourbon and vanilla. Be careful as it will bubble up. Continue whisking until combined. Serve warm over the Chocolate Bread Pudding.
  2. The remaining sauce can be kept in the refrigerator for up to a week and re-heated over low heat as needed.


Tuesday, November 1, 2011

Mexican Chocolate Cupcakes


SO, it's the day after Halloween and I know what you are thinking, "boy, I could really go for some chocolate!" No?  Well, I am forging ahead with this recipe anyways, as I think you may change your mind, because this is chocolate for the adults. It is not that cloyingly sweet stuff that your children are currently inhaling. It does not come in miniature size nor is it in a bright plastic wrapper.


This is the good stuff! It is dark, intense chocolate with a fragrant dose of cinnamon and a nice kick of heat from ancho and cayenne peppers. It is chocolate all grown up. Have I convinced you yet? Well, after the kids are in bed, grab yourself a nice strong coffee and one of these little cakes. I think you will be glad you did.

This recipe is essentially an amalgam of my Vegan Chocolate Cupcake recipe and my Spicy Hot Chocolate recipe.   I was having someone over for coffee and was looking to make a quick little cake to serve with our drinks but I wanted something a bit out of the ordinary.  I thought the two would work well together and I was quite happy with the result. 


I love these vegan cupcakes. They are consistently moist and intensely chocolaty and the addition of the cinnamon and the pepper add a lovely complexity. The heat and sweetness of the buttercream added the perfect finishing note. Delish. Just don't let the kids get their hands on these, otherwise you may get stuck with the Halloween candy.


Mexican Chocolate Cupcakes
This is an adaptation of my Vegan Chocolate Cupcake recipe.

Prep time: 10 minutes
Cook time: 20 minutes
Total time: 30 minutes
Yield: one dozen

Ingredients
  • 1 1/4 cup all purpose flour
  • 1 cup  sugar
  • 1/3 cup good quality unsweetened cocoa powder (I use Ghirardelli)
  • 1 teaspoon baking soda
  • 1/2 teaspoon salt
  • 3/4 teaspoon espresso powder
  • 1 teaspoon cinnamon
  • 1 teaspoon vanilla
  • 1 cup warm water
  • 1/3 cup vegetable oil
  • 1 teaspoon distilled apple cider vinegar
Cooking Directions
  1. Preheat oven to 350 degrees.
  2. Prepare a 12 cup muffin pan with paper liners or grease and flour the cups well.
  3. In an medium bowl, mix together flour, sugar, cocoa, baking soda, and salt with a whisk. Make sure that all the ingredients are well blended. Add the warm water, vanilla, oil, and vinegar. Stir until well combined. Do not over mix.
  4. Fill muffin cups 3/4 full with batter and bake in the centre of the oven for 15 to 20 minutes or until the cakes spring back when you lightly touch the centre.
  5. Remove from oven. After 5 minutes, carefully remove the cupcakes from the tin and let cool completely on a wire rack before icing.


Mexican Chocolate Buttercream Frosting

Total time: 15 minutes
Yield: one dozen cupcakes

Ingredients
  • 1 cup butter, at room temperature
  • 3/4 cup unsweetened premium cocoa powder
  • 4 cups icing sugar
  • 3 - 4 tablespoons milk
  • 1 teaspoon cinnamon
  • 1/2 teaspoon ancho chili powder
  • 1/2 teaspoon cayenne pepper
  • 1/8 teaspoon nutmeg
  • 1 teaspoon vanilla
Cooking Directions
  1. Using a hand beater or stand mixer, at low speed, cream together butter, cocoa powder, the spices, vanilla extract and icing sugar. The mixture will be stiff and dry at this point. 
  2. Continuing at low speed add milk a tablespoon at a time until the frosting reaches the desired consistency. Turn your mixer onto high speed to make the frosting light and fluffy.
  3. At this point you will want to check the flavour of the icing and adjust the spice level to suit your tastes. Add more of the chili and pepper if you want it more spicy.
  4. Ice the cupcakes with a palette knife or a pastry bag. Enjoy!


Sunday, October 30, 2011

Chicken Marbella


Chicken is that ubiquitous ingredient that shows up every week and usually fails to inspire.  It is a go-to staple when I am shopping because it is an easy sell with the kids and is a versatile ingredient for any number of recipes. 
But it is often a big bore. I am seldom truly excited at the thought of chicken for dinner.  It is a good comfort food but I never order it when I go out.  It just seems too mundane and I always want something special when I go out for a meal. It's like a guest that keeps showing up, with nothing new to say and never knowing that they have overstayed their welcome. Honestly, chicken it is time you came up with a better story.


Well, this week, it did. This week, chicken transformed itself into Chicken Marbella, a flavourful, unique and completely unexpected performance from my boring old friend.  Chicken finally went out and bought itself a new dress and got it's hair done.
This is the classic recipe from the Silver Palette Cookbook.  I found it, as I do so many recipes, while surfing the Internet. I read the ingredient list and thought "what a completely odd and (I hate to say it) kind of off-putting combination of flavours". Chicken, prunes, olives, capers, white wine, brown sugar???? Well, curiosity got the better of me and I tried it. 
What can I say, it is absolutely delicious. The sauce is complex and sophisticated. A combination of heady sweetness from the dried prunes with the sour and bitter flavours of the green olives and capers. In a word, it is sublime. And better still, it is so easy to make.  Chicken pieces are marinated overnight and then baked. This is a "wow" dinner party meal with very little prep or effort.  I think I just got excited about chicken!


Chicken Marbella
This recipe had been adapted from The Silver Palette Cookbook.

Prep time: 12 hours
Cook time: 1 hour
Total time: 1 day
Yield: 10 - 12

Ingredients
  • 4 chickens, skinned and quartered
  • 1 whole head of garlic, peeled and minced
  • 1/4 cup dried oregano
  • 1/2 cup red wine vinegar
  • 1/2 cup olive oil
  • 1 1/2 cup pitted prunes
  • 1 1/2 cup large green olives
  • 250ml jar of capers with the juice
  • 1 cup white wine
  • 1 cup brown sugar
  • 1 teaspoon salt
  • 1/2 teaspoon fresh ground black pepper
  • chopped fresh parsley

Cooking Directions
  1. In a large oven safe baking dish combine the chicken, garlic, oregano, prunes, olives, capers with their juice, wine vinegar, olive oil, bay leaves and salt and pepper. Stir to coat the chicken. Cover and refrigerate overnight.
  2. When ready to cook, preheat oven to 350 degrees.
  3. In the same baking dish, sprinkle the brown sugar over the chicken and marinade. Pour the white wine over it.
  4. Bake in the centre of the oven for 1 to 11/2 hours, basting the chicken frequently with the marinade. Chicken is done when the breast and thigh juices run clear when poked with a knife at the thickest part.
  5. Remove from the oven. Sprinkle with parsley. Can be eaten hot or cold. Serve the chicken with a bit of the marinade and some of the prunes, olives and capers. Enjoy!


Tuesday, October 25, 2011

Halloween Gingerbread Cookies


I have very fond childhood memories of Halloween.  Nothing, save Christmas morning, could compare with the excitement of Halloween night. Rushing home from school, carving the pumpkin, a quick dinner then getting outfitted in my costume and heading out collection bag (and UNICEF box) in hand.

I loved dressing-up and pretending I was someone else. I loved the excitement, the thrill of being out in the night, in the dark.  My mother was a big believer in the do-it-yourself costume which, I think, added a lot to the experience. I could become anyone with a little imagination and a few carefully chosen odds and ends. I vividly remember putting together an endless number of costumes from old clothes, sheets, make-up and whatever else I could find around the house.

 As an adult, however, Halloween became less important. It was just another day. Then...I had kids of my own and now, happily, the excitement is back.  We are putting together costumes, decorating the house, picking out pumpkins and generally immersing ourselves in the thrill of Halloween night.


So when I discovered that my children's new school has an annual Fright Night Fundraiser, I was determined to get right in there and help with this year's event. Which meant, of course, that I would bust my butt making a ton of cookies for the Witches' Kitchen Bake Sale ( i.e. 6 dozen Halloween themed Gingerbread Cookies!)

My husband's great mantra for me is always, "don't overdo it!". Unfortunately, I never listen.  At 7:00am the morning of the event I am donning my apron (I want the cookies to be as fresh as possible) and by 2:00pm my hand has cramped up, I am swearing like a sailor (...in my head) and laying cookies out to dry...with 3 hours to spare.  GD! why do I do that to myself. 

Oh well, it was good fun and the kids were "bouncing off the wall" excited by the time we were getting into our costumes and heading over to the school and the cookies sold like hotcakes.

Phew, we haven't even made it to Halloween yet! I've got to pace myself.


Gingerbread Cookies
This is my Grandfather's recipe and it is a staple in our house around the Holidays.  It makes a nice mild gingerbread and, though I am biased, I think it is the best Gingerbread Cookie recipe I have ever tasted!

Prep time: 15 minutes
Cook time: 10 minutes
Total time: 25 minutes
Yield: 3 dozen

Ingredients
  • 1 tablespoon molasses
  • 1 cup brown sugar
  • 1/2 cup granulated sugar
  • 1/4 teaspoon salt
  • 1/4 teaspoon ground cloves
  • 2 teaspoons ground ginger
  • 2 teaspoons cinnamon
  • 1/2 teaspoon allspice
  • 1 teaspoon baking soda
  • 1/2 cup butter
  • 2 eggs
  • 2 cups all purpose flour, plus more for rolling

Cooking Directions
  1. Preheat the oven to 350 degrees.
  2. Using a stand mixer (with the paddle attachment) or hand mixer, cream together the sugars, molasses and butter, about 1 -2 minutes. Add the eggs, one at a time, and mix just until incorporated.
  3. In a separate small bowl whisk together the dry ingredients until combined. Add the mixed dry ingredients to the butter, egg and sugar mixture. Beat until all ingredients are incorporated and come together into a stiff cookie dough.
  4. Taking about half of the cookie dough at a time, roll out to 1/4 inch thickness on a well floured surface.
  5. Initially the dough is very sticky and soft so you will have to add a generous amount of flour to keep it from sticking to your surface. However, this dough is very forgiving and the cookies will not suffer from the addition of a little extra flour.
  6. Cut the dough into desired shapes with your cookie cutters and transfer to a cookie sheet lined with greased parchment paper or a Silpat sheet. Continue until all of the dough has been cut out into shapes.
  7. Bake in the centre of the oven for 8-10 minutes or just until golden brown.
  8. Transfer cookies to a cooling rack. Wait until the cookies are completely cool before icing. Decorate with Royal Icing. Enjoy!

Royal Icing

Ingredients
  • 2 egg whites (if your do not like using raw eggs you can use meringue powder)
  • 2 cups icing sugar
  • pinch salt
  • food colouring

Directions
  1. Whisk the egg whites, icing sugar and salt together in a small bowl. The mixture should be smooth and thick but still loose enough that it will flow through an icing tip.
  2. Separate into a couple of bowls (depending on how many colours you want to use) and add your food colouring.
  3. Decorate cookies as desired. You can use a pastry bag with a writing tip or a small zip lock bag (with a very small hole cut in one corner) to make thin outlines similar to the ones pictured above.

Sunday, October 23, 2011

Shepherd's Pie


Hi there and greetings from Hamilton, Ontario.  Long time no see (hear?...write?), whatever it has been a while.

Way back in, God when was it... March, I published a lovely recipe about Apple Butter and then, well, things kind of turned up side down. First, my husband got a new job in the Hamilton area, which was great news but soon became a logistical nightmare for our family.  With the amount of travel required for my job and now a 2 hour commute to and from work for him life became stressful to say the least.  Coordinating dropping off, picking up, feeding and caring for children took a village, literally, and many undying thanks to all of the friends, neighbors and family members who pitched in and helped.

So, quickly determining this could not continue, we made the decision that I would quit my job (yeah), leave the city that I have lived in almost my whole life and LOVE (boo), and find a home closer to my husband's work.

Leaving work was not a hard decision.  I hated the travel and am not overly fond of the values of the retail industry. Leaving the city was another matter.  True, we have not moved that far, but for a life long city dweller and urbanite I can tell you that it has been quite an adjustment.

The good news is that I have more time to spend with my family and I have discovered very quickly that I love Hamilton. We found a neighborhood very much like where we lived in Toronto.  The pace of life is much kinder, the people we have met are very warm and welcoming and the cost of real estate is heaven compared to Toronto. Now, if I could find a good latte we would be all set!


So now here I am (okay, took me a little longer to adjust than I anticipated) back at it and excited to be starting fresh in a new home, (with a fabulous big kitchen I might add), in a new city.  And best of all I will now get to explore all of the wonderful local eateries, farmer's markets and food retailers. In fact, a trip to Fenwood Farm provided me with the ground beef I used in this recipe.  We always bought our organic chickens from Fenwood Farms through our local butcher in Toronto, now we are just minutes away from the farm itself!  Living out hear definitely has its advantages.

Having said all of that, let's get to why we are here...the recipe.  I decided to start back with some comfort food: Shepherd's Pie.  This is a great simple meal for a cool autumn night.  It is very adaptable to individual tastes and is also a great "use up what I have in my fridge" kind of recipe.


Shepherd's Pie

Prep time: 25 minutes
Cook time: 25-30 minutes
Total time: 1 hour
Yield: serves 6

Ingredients
  • 1 pound ground lamb
  • 1/2 pound ground beef
  • 1 medium onion
  • 1 large carrot, diced
  • 2 stalks celery, diced
  • 2 cloves garlic, minced
  • 2 teaspoons fresh rosemary, minced
  • 2 teaspoons fresh thyme, minced
  • 1 tablespoonWorcestershire sauce
  • 1 tablespoon olive oil
  • 1/4 cup water
  • 1 small boiled potato, mashed
  • 1 cup fresh or frozen peas
  • 1 teaspoon salt
  • 1/2 teaspoon pepper
  • Garlic Mashed Potato Topping

Cooking Directions
  1. Preheat the oven to 350 degrees.
  2. Over medium heat, brown the ground lamb and beef in a large saute pan with the tablespoon of olive oil. Add the onion, garlic, carrot, celery and chopped herbs. Saute 5 to 10 minutes until the vegetables are beginning to soften. Stir in the salt and pepper, Worcestershire sauce, mashed potato and the 1/4 cup of water. Simmer over low heat until the water is absorbed. The potato will help to thicken the mixture so that it does not fall apart when you are serving. Stir in the cup of peas and season to taste, adding more salt or pepper if you desire.
  3. Transfer the meat mixture to an oven safe casserole dish. Top with the Garlic Mashed Potato Topping (recipe follows). Create a rough texture with the topping so that it browns while in the oven. Bake for 25-30 minutes, or just until the meat mixture is bubbling and the topping has browned. Serve and enjoy.


Garlic Mashed Potato Topping
These are great on their own with a roast chicken or stew!

Prep time: 10 minutes
Cook time: 20 minutes
Total time: 30 minutes
Yield: 6 servings

Ingredients
  • 8 medium Yukon Gold or other golden flesh potatoes
  • 4 cloves garlic, peeled
  • 1/4 cup butter
  • 1/4 cup milk
  • 1/4 cup grated Parmesan or Cheddar cheese
  • 1 tablespoon sugar
  • 1 1/2 teaspoon salt
  • 1/2 teaspoon pepper
Cooking Directions
  1. Peel potatoes and chop into large pieces. Place potatoes and peeled garlic cloves in a medium sized saucepan and add enough water to cover.
  2. Boil 20 - 25 minutes (while you are sauteing the meat and vegetables for the filling) until the potatoes are fork tender (meaning a fork or knife slides easily into the potato when you test it).
  3. Drain the water from the saucepan and add the remaining ingredients. Mash together with a potato masher until the mixture comes together and is smooth. You can whip with a whisk or give it a whiz in the food processor if you want the potatoes really smooth, I don't bother.
  4. Taste and season further with salt and pepper if desired.
  5. Spoon the topping over the meat filling in the casserole dish and "rough up" the top with a fork so that it will drown nicely.

Monday, October 17, 2011

Feast For the Fight


I was recently contacted by Liz at the Canadian Cancer Society with information regarding a fantastic event which is happening in restaurants around Toronto this Wednesday October 19, 2011.  This annual event is called the Feast for the Fight. Participating restaurants will donate a portion of their sales on that day to the Canadian Cancer Society in support of it's mission to eradicate cancer and enhance the quality of life of Canadians living with cancer. 

I cannot think of a better reason to go out and enjoy a meal, expecially as participating restaurants include the likes of Le Petit Castor, Wildfire Steakhouse & Wine Bar, The Queen Mother, The Rebel House, La Passione, Bedford Academy, Il Posto and many more.


For more information please go to feastforthefight.ca and if you are interested in finding out more about the Canadian Cancer Society please visit fightback.ca

Stay tuned, as I will be keeping this post up until Wednesday the 19th and then I will be back with more delicious recipes and an update on what the heck I have been doing. (hint...no longer living in Toronto!)

Sunday, March 13, 2011

Apple Butter


We go through a lot of apples in my house.  I buy at least a couple of bags a week, for snacks, lunches or  anytime my girls need something to munch on. They love apples. And of course, I use them in pies, tarts, cakes, even salad.  I didn't think there was anything left to do with an apple.

Not so.  Apple Butter.  I tell you, I don't know why the h--- I didn't make it before. I am addicted.  And what a good way to use up apples that have gotten bruised or a little past their prime, because despite all good intention I always end up with quite a few of those.


It could not be simpler to make. You don't even have to peel or core the apples. Just give them a good wash, cut them in quarters and into a saucepan they go. About 45 minutes later you have Apple Butter. 

So what do you do with it? Well, it is perfect with bread and butter, as a sauce over cake or on ice cream. Your only problem will be trying to keep everyone from eating it right out of the saucepan.  I was able to hold my crew back long enough to make Cheddar Biscuits.  I made my favourite biscuit recipe and added a handful of a sharp Cheddar Cheese. It was a great combination. Now, if you excuse me, I have some more Apple Butter to make!


Apple Butter
Prep time: 5 minutes
Cook time: 45 minutes
Total time: 1 hour
Yield: 2 cups

Ingredients
  • 10 apples, washed and cut in quarters
  • 1 cup brown sugar
  • 1/2 cup apple cider
  • 1/4 teaspoon ground cinnamon
  • 1/4 teaspoon ground nutmeg
  • 1/4 teaspoon ground allspice
  • 1/8 teaspoonground cloves
  • 1/4 teaspoon salt
  • 1 teaspoon vanilla extract

Cooking Directions
  1. Place all ingredients into a large saucepan and cook over medium-high heat until apples break down and become very soft.
  2. Working in batches strain the mixture through a fine sieve to remove the skins and seeds. Return to the saucepan and continue to simmer until most of the liquid has evaporated and the sauce is very thick and dark brown.
  3. Allow to cool and serve on bread, over ice cream or anyway you like.
  4. It can keep for up to a month in the fridge, if it lasts that long.

Friday, February 25, 2011

Scallion Pancakes


I am working on simplicity right now. Trying to pare things down so that only what is important to me is left. Sounds like a straightforward task, but, boy, simplicity is not so easy to come by. It's about shutting out the noise and all the little things that pull you in a million different directions and focusing on what matters most. So I am in the process of getting there.

You know what else; I am discovering that simplicity is a group effort. It has become a major topic of conversation between my husband and me. How to get there, what it means, what to let go of and what to keep. The good news is we seem to be on the same page (which means he will stay in the keep pile!)

And why? Well, because wonderful things can come from very simple beginnings. You keep what is best and discard what is just taking time and energy with no return.  And no, I am not just talking about possessions but also about how I spend my days and what I focus on.


I am discovering that this is a philosophy that works well both in life and in cooking. These Scallion Pancakes are a perfect example. Crisp, delicate, salty and flavourful; these little pancakes are simplicity at its best.

I had seen a few different versions in my travels through the internet. I thought they looked interesting, but they did not every really capture my attention until I saw Ellie's beautiful looking pancakes on Almost Bourdain.


They are easy to make and take no time to cook. And in the end you have a nice little bite, perfect as a starter or a little nibble with cocktails. What more could you ask for?

Scallion Pancakes Recipe
Adapted from Almost Bourdain
Makes 2 servings

1 3/4 cups all-purpose flour plus extra for dusting
1/2 tsp salt
1/2 cup warm water
2-3 spring onions, sliced very fine
1/4 cup vegetable oil
coarse salt
soya for dipping

Sift flour and salt into a big bowl and stir to combine. Make a well in the middle and add the warm water. Using your hands mix together to form a smooth dough. Cover with cling wrap and let it rest for 30 minutes.
Next, divide the dough into 2 equal parts.Working with one portion at a time, place the dough on a lightly floured surface. Roll out to a circle, trying to roll as thin as possible.  Generously brush with vegetable oil.


Sprinkle the dough with half of the chopped spring onion. (Ellie used just the greens from the onions but I wanted a stronger flavour, so I used some of the white part and I made sure I sliced it very fine.)


Starting with the edge closest to you, roll up the dough and pinch the ends to seal in the onion and oil.


Lightly flatten and then roll it into a coil, pinching the end to seal it. Now roll out the coil into a circle.


This process of rolling into a cigar shape and then wrapping into a spiral and rolling out again creates light flaky layers when you cook the pancake, so do not shortcut.

Heat a non-stick frying pan over medium heat with a tbsp of vegetable oil. Cook the pancake for 3-4 minutes on each side, turning once, until it is crisp and golden brown.


Sprinkle with a little coarse salt, cut into wedges and serve immediately.  You can use a little soya for dipping if you like. Enjoy!

Saturday, February 19, 2011

Program Note

Radishes and Rhubarb is now radishesandrhubarb.com.  That's right, I got rid of the "blogspot" in the url address. Rest assured, everything else will stay the same, just needed a little simplification. Thanks for reading and a new post will be up soon!

Monday, February 14, 2011

French Apple Tart


After I had my daughter I made the decision to buy organic as much as possible.  It is amazing what having a baby can do to your thought process.  I had always been a very particular eater, and felt I was very choosy about my purchases, but once I had a new little person depending on me I began to examine what I was eating even more closely. I suppose it is a rather sad fact of life, but the things that you put up with for yourself you would not allow for your child. And so it was that I began to demand organic food at my table, food that was not laden with chemicals, pesticides, herbicides, hormones, antibiotics, etc, etc, etc.


Now, I will be honest, organic products are not always easy to find and often they are prohibitively expensive.  While choice and price has improved dramatically over the last few years there is still a long way to go.  That is something that consumer pressure and the need for organic producers to be competitive will continue to improve. Until then, I think what you buy and eat becomes a matter of personal priority.  I have switched entirely to organic meat(when we eat meat, which is much less that before), dairy and eggs.  To me, buying organic meat, dairy and eggs has a tremendous impact on the quality of animal care, the environment and our health. 

When it comes to produce, I use the dirty dozen list as a guide. As for the other items on my grocery list,  I try to buy seasonal and organic as much as possible.


So, being a mom led me down this path and this path has led me to other great things as well.  For one, I met a lovely woman by the name of Tanmayo while organizing the FRESH Event last year.  She is the Chair of the Toronto Chapter of the Canadian Organic Growers Association. COG, as they are called, is a great resource for anyone who wants to switch to organic.  They are very active with local retailers, they have workshops and gardening seminars and they provide a list of resources available in the Toronto Area. 

This Saturday is their annual conference and I was honoured to be asked to moderate one of the panel discussions. Our panel will discuss the power of mothers to force change and improve things for the better.  If you are in the Toronto area I encourage you to come down.  I think it will be a very interesting and informative day.


In the meantime, I have a simple and delicious French Apple Tart to share with you.  I made this, of course, with organic Granny Smith apples.  It is subtle and elegant; a real show stopper. I found the recipe on Crumpets and Cakes.  It is from the Barefoot Contessa, which is not a surprise because Ina Garten consistently turns out amazing recipes. I am sure this will become a favourite for you as well.


French Apple Tart
adapted from The Barefoot Contessa, Back to Basics

6 Granny Smith apples, peeled cored and sliced thin
1/2 cup sugar
1/2 cup warm sieved apricot jam 
2 tablespoons Calvados (apple brandy) or apple juice

Pastry
2 cups all-purpose flour
1/2 teaspoon kosher salt
1 tablespoon sugar
2/3 cup vegetable shortening
6 - 7 tablespoons ice water

For the pastry, place the flour, salt, and sugar in a medium bowl. Cut in the shortening with a fork or a pastry cutter until the mixture resembles coarse crumbs. Add the cold water and stir just until the dough starts to pull together. Turn out onto a well floured surface. Quickly shape into a ball wrap in plastic and refrigerate for at least 1 hour.

Preheat the oven to 400 degrees F. Line a sheet pan with parchment paper.On a well floured surface, roll the dough slightly larger than 10 by 14-inches. Place the dough on the prepared sheet pan and trim the edges. Refrigerate while you prepare the apples. Place overlapping slices of apples diagonally down the middle of the tart and continue making diagonal rows until the pastry is covered with apple slices.


Sprinkle with 1/2 cup of sugar. Bake for 45 minutes to 1 hour, until the pastry is browned and the edges of the apples start to brown. Rotate the pan once during cooking. While the tart is baking, heat the apricot jelly together with the Calvados and run through a fine sieve. Brush the apples and the pastry completely with the jelly mixture. Loosen the tart with a metal spatula so it doesn't stick to the paper. Allow to cool and serve warm or at room temperature

Tuesday, February 8, 2011

Whole Wheat Bread


Hi there, I want you to read something:

"When the girl returned, some hours later, she carried a tray, with a cup of fragrant tea steaming on it; and a plate piled up with very hot buttered toast, cut thick, very brown on both sides, with the butter running through the holes in it in great golden drops, like honey from the honeycomb. The smell of that buttered toast simply talked to Toad, and with no uncertain voice; talked of warm kitchens, of breakfasts on bright frosty mornings, of cosy parlour firesides on winter evenings, when one’s ramble was over and slippered feet were propped on the fender, of the purring of contented cats, and the twitter of sleepy canaries."

Isn't that lovely.  It is a passage from one of my favourite childhood stories, The Wind in the Willows by Kenneth Grahame.  Doesn't it beautifully evoke that scene; warm tea, fresh bread and melting butter.  And I know what you are thinking now, "I want toast." Me too. Lucky for you I just made some.


I was re-reading the book last week and when I got to that passage I immediately wanted fresh bread. Not just any bread, mind you, no flimsy slices pulled from a plastic bag but fresh, homemade bread; the kind that can stand up to a thick slathering of butter.  But bread takes hours and hours to make, so what to do?


Well, as it turns out that is not always the case. I have a great recipe that makes two lovely dense loaves of bread in just over an hour. That's right, just over an hour from mixing bowl to thick slice of warm bread covered in melted butter. I came upon this recipe by accident. I was looking for a no knead recipe and I stumbled upon this Easy Bread recipe on a site called The Heart of New England. It is simple to do and turns out perfect every time.  You can change it up, make white bread, brown bread, raisin bread...whatever you like. 


Easy bread
from The Heart of New England

5-6 cups all-purpose flour, (I used 1 cup of whole wheat flour (Red Fife Wheat, to be exact) and all-purpose unbleached for the rest.)
2 tablespoons of dry yeast
2 tablespoons brown sugar
1 tablespoon salt
2 cups hot water (120-130 degrees F.)
A cake pan of hot water

Mix 3 cups of the flour with the yeast, sugar and salt. Pour in the hot water and beat for 100 strokes (or 3 minutes with a mixer). Stir in the remaining flour until the dough loses its stickiness. You may not need all 6 cups, just add enough flour, a cup at a time, until the dough is no longer sticky. Turn onto a well floured surface. Knead for 8 minutes. 

A note about kneading: I think this is the part about making bread that intimidates a lot of people .  It is quite simple, once you get the hang of it. Flatten the dough slightly by pressing down with the palm of your hand, then fold in half and push away from you with the heel of your hand.  Turn the dough a quarter turn and repeat.  Keep doing this for 8 minutes until the dough is smooth and elastic.  Add a little flour as you knead if the dough is sticky.

Place dough in a lightly greased bowl and cover with a warm damp cloth. Let rise for 15 minutes in a warm spot (I use my oven.  I turn it on for about 30 seconds and then turn it off right away, then I leave the bowl of dough in there to rise).

Punch the dough down and divide into two pieces. Shape into two round loaves and place on a greased baking sheet. Cut an "X" one-half inch deep in each of the loaves with a wet sharp knife.

Place baking sheet with loaves in the middle of a COLD oven. Place a pan of hot water on the lowest shelf(this will help to create steam in the oven which will give your bread a crisp crust). Heat the oven to 400 degrees and bake 30-40 minutes or until golden brown. You can tell your bread is done when you tap your finger on the top crust and it sounds hollow.

Remove from the oven and let cool.  Slice thick, toast it or not,  and spread with butter, jam or whatever you like. Enjoy
Related Posts Plugin for WordPress, Blogger...