Monday, June 28, 2010

Strawberry Jam


In keeping with the spirit of the Roast Duck dinner I made a little while ago, I decided to make something else that I have never attempted before. I decided to make cooked Strawberry Jam.

Up until now I had avoided making cooked jam because the prospect of sterilizing the jars just kind of felt fussy and (as I am a worrier) something to worry about. It turned out to be a simple and painless process. Almost ridiculously easy.


But that is not why I am glad I went ahead and made Strawberry Jam. I am glad because it gave me an excuse to talk about an e-mail I received last week.

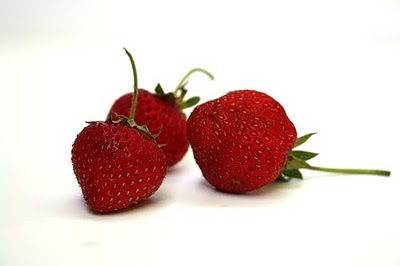
Strawberries, to me, are a very seasonal food and the season in Ontario is very short, just a couple of weeks. Making jam is the traditional way to save that taste of summer for the rest of the year.


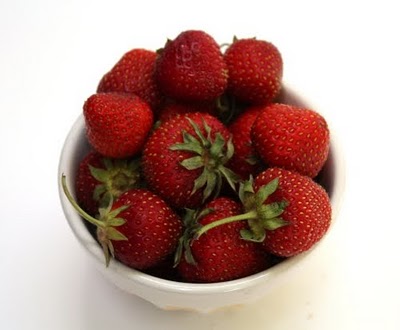
But now, of course, we can get Strawberries all year. They come in plastic jewel boxes, shipped from thousands of miles away. They look like strawberries on steroids and they seldom taste much different than I imagine the plastic boxes themselves would taste (if I were to go ahead and give one a try). As you can tell, I am not a fan of those jumped up strawberries so I really don’t buy them.

Then last week I got an e-mail from Christiana from the Harmonious Kitchen in California. She reached out to me, and many others, asking for help. She is trying to raise awareness about safety concerns over the pesticides that are being used on these conventionally grown strawberries. She is in the unenviable position of being personally affected by this issue.


Christiana lives right next to an industrial strawberry farm. She watches workers in the morning, wearing haz-mat suits spraying these chemicals on the fields right outside her home. As the mother of two young children, she is naturally concerned.

In particular, she is concerned about the use of methyl bromide and methyl iodide. Her very well written article explains, better than I ever could, her concerns and fears living so close to this pesticide laden land. For more information, you can also read these articles from Grist and the Huffington Post.

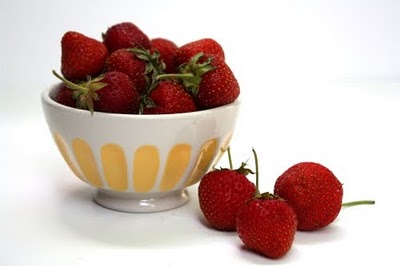
So I think I will stick to my Ontario strawberries and I will enjoy the fact that they are available for only a short time every year.  That is part of what makes them so special.

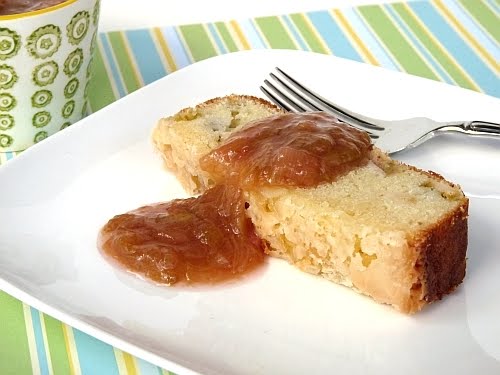
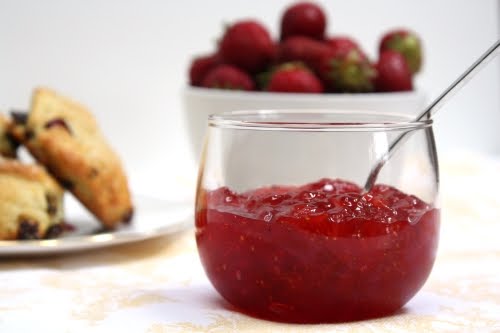
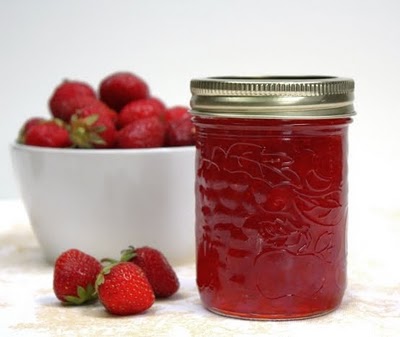
And, when I desperately want a taste of Ontario strawberries in the middle of winter I am going to open a jar of this jam.  It is just as Strawberry Jam should be; a glorious ruby colour, full of strawberry flavour, simple and delicious.


Strawberry Jam
I used the recipe inside the Certo Liquid Pectin package.  It is my favourite kind, but whichever pectin product you use, be sure to follow the directions on their package as all are a little different.

3 3/4 cups crushed strawberries

1/4 cup lemon juice
7 cups sugar
1 package Certo Liquid Pectin

Preheat the oven to 225 degrees F.  Wash and rinse 8 one cup jam jars. Drain the jars of excess water and place them upright on a cookie sheet.  Place the cookie sheet in the 225 degree oven for a minimum of 10 minutes. This will sterilize the jars. You can keep the jars in the oven until the jam is ready to be poured into the jars.

Place the washed lids and seals in a medium saucepan filled with water along with a set of metal tongs, which will be used to place the lids on the jars.  Boil them for at least ten minutes.  I kept the water boiling while I cooked the jam.

Use a potato masher to crush the berries, one layer at a time. With liquid measuring cup measure out the 3 3/4 cups of berries. Pour the berries into a large saucepan. Add the sugar and lemon juice. Do not reduce the amount of sugar, the full amount must be used for the jam to set. Turn the heat to high and bring to a full rolling boil. Let boil for one full minute.

Remove from heat and stir in the package of liquid pectin. Skim the foam from the top with a large flat metal spoon and stir the jam for 5 minutes to distribute the fruit evenly.

Remove the cookie sheet with the jam jars from the oven. With a small ladle, fill the jars with jam, leaving 1/4 inch of space from the rim. Using the tongs (cover your hand as the tong handle may be hot from being in the boiling water) remove the seals from the water, one at a time. Shake excess water from the seal and place on the jar. Then, still using the tongs, remove the rings. Again, shake off excess water and place the rings over the seals and tighten firmly.

The jam will take about 12-24 hours to set. The seals should pull down as the jars cool and you may hear clicking sounds as the seals form. If the fruit has settled to the top, turn the jars over to redistribute as they cool. 

Jars may be kept unopened up to one year on the shelf.


Next Post: Savoury Bread Pudding

Friday, June 25, 2010

Vegan Chocolate Cupcakes


Yes, I made vegan cupcakes and I want you to know they were very good. Not just okay, or “not bad for a vegan recipe” but very, very good. In fact, I think they turned out better than the cupcakes that I made from my favourite Chocolate Cake recipe.

I had not originally set out to make something vegan but circumstances pushed me in that direction and the result was a nice surprise. I was bringing cupcakes to my daughter’s kindergarten class for her birthday but it turned out that one of the little guys in her class had a dairy and egg allergy. I decided that I would find a vegan recipe so he could have a cupcake too.


Being the skeptical sort, my original intention was to make the regular chocolate cupcakes for the class and just bring a couple of the vegan cupcakes for him. Then, by one of the mysterious laws of baking, the cupcakes from my usually oh so moist and wonderful Chocolate Cake recipe turned out a little dry. This seems to be a fairly common problem. Something that works so well in the larger cake form does not hold up in the smaller cupcake version. When the vegan ones turned out so fluffy, moist and rich I decided to bring them for everyone.

Up until now I had been unconvinced that you could make something as light and airy as a cake without the use of butter, milk or eggs. Most of the vegan baked goods I had tried so far always seemed a little…meh. Well, this recipe has made me a believer and it made me a little curious. I decided to search around on the web to find other vegan baking recipes and I came across this site. Now, I’m not saying I am giving up baking with butter, milk and eggs, but I am definitely open to trying new things. Plus, it never hurts to have a full bag of tricks for when you just have to have a cake, or a cookie, or a pie, or a pudding, or…


Vegan Chocolate Cupcakes
from a recipe found at the Instructables website

for the Cake:
1 1/4 cups flour
1 cup sugar
1/3 cup unsweetened cocoa powder
1 teaspoon baking soda
1/2 teaspoon salt
1 cup warm water
1 teaspoon vanilla extract
1/3 cup vegetable oil
1 teaspoon distilled apple cider vinegar


for the glaze:


1/2 cup sugar
4 tablespoons margarine or vegetable shortening
2 tablespoons soy milk
1 tablespoon water
2 tablespoons unsweetened cocoa powder
1 teaspoon vanilla

Preheat oven to 350 degrees. Prepare a 12 cup muffin pan with paper liners or grease and flour the cups well.
In an medium bowl, mix together flour, sugar, cocoa, baking soda, and salt with a whisk. Make sure that all the ingredients are well blended. Add the warm water, vanilla, oil, and vinegar. Stir until well combined. Do not overmix.
Fill muffin cups 3/4 full with batter and bake in the centre of the oven for 15 to 20 minutes or until the cakes spring back when you lightly touch the centre. Remove from oven. After 5 minutes, carefully remove the cupcakes from the tin and let cool completely on a wire rack before icing.

Make the glaze:

In a small saucepan, bring the sugar, margarine, water, milk, and cocoa to a boil, stirring frequently. Reduce heat and simmer for 2 minutes, stirring constantly. Remove from heat, add vanilla and stir for 5 minutes.

Using a tablespoon, pour a little of the glaze over each cupcake.  Add sprinkles, if desired.


Tuesday, June 22, 2010

Roast Duck with Orange Sauce


From time to time I ask my husband to read through my articles before I post them. I sometimes want a different set of eyes to look over what I have written before I send it out into the great beyond. The other day, after reading something he said, “Your blog is written for pretty advanced cooks.”

I was surprised he said that, because my intention was to share recipes that are accessible to anyone. I tried to make the recipes easy and straightforward, but that was the very place where hubby felt that I was speaking to a more advanced audience. He felt the terms and instructions would not be familiar or easy to understand for a non-cook. It took my husband’s “non-cooking” eyes for me to see that the recipes I have been posting may not be so accessible after all.

I forget how daunting cooking and baking can be to someone who does not cook. Yet, to my mind the only way to become a confident cook is to just do it. I have had that experience with friends who have asked for help and I have found time and again that it is the only way to become a confident chef or baker.

Julia Child was a big believer in that. She always told her audience not to be afraid of making a mess or making a mistake. She once said, “The only real stumbling block is fear of failure. In cooking you've got to have a 'What the hell?' attitude.”


So I decided to have a “what the hell attitude” and make something I have never tried before. The funny thing is, as long as I have been cooking and baking there are things that I just psych myself out about and I won’t try.

Roast Duck was one of those things. I don’t know why, because I have made roast chicken a million times, but duck just seemed like a challenge. Most likely it is because I was not following my own advice. There is a pretty strong probability when making duck that it could turn out tough or greasy if you don’t do it right and I don’t like to make mistakes.

So I threw caution to the wind and I bought a duck. I found a recipe, followed it to the letter and the duck turned out…a little tough. But you know what, it was still good and next time I will do things a bit differently and I am sure it will be just right.


Roast Duck with Orange Sauce
adapted from a recipe from Canadian Living Magazine

1 medium sized duck
1 teaspoon salt
1 teaspoon pepper
1 orange, quartered
2 bay leaves
1 onion, quartered
1/2 cup chicken stock
2 tablespoons flour
salt and pepper to taste


Glaze:
1/4 cup freshly squeezed orange juice
2 teaspoons orange-flavoured liqueur
1 teaspoon red wine vinegar
1 tablespoon granulated sugar


Preheat oven to 400 degrees. In a small bowl, whisk together the ingredients for the glaze and set aside.

With a sharp knife, cut 1 inch slices in the skin of the duck breast and legs, being careful not to cut into the flesh.  Duck is very fatty and this will allow the excess fat to drain during cooking. Sprinkle the inside cavity with half of the salt and pepper and stuff with the orange quarters, onion quarters and bay leaves. Sprinkle the skin with the remaining salt and pepper.

Place the duck, breast side up, in a roasting pan fitted with a metal draining rack. Roast in 400 degree oven for 35 minutes. Pour off clear fat and baste with glaze. Return to the oven.

Turn the oven down to 350 degrees and continue to roast for about 1 1/2 hours. Baste with glaze and pan juices every 15 minutes, until thermometer inserted in thickest part of thigh reads 185°F. Overcooking the duck is what can make it tough, so begin checking the internal temperature at about 1 1/4 hours. Remove oranges, onions and bay leaves and set aside. Transfer the duck to a plate and cover loosely with foil.

Pour the pan juices into a saucepan. Skim off any fat and discard.  Add the chicken stock and any remaining glaze to the saucepan.  In a small cup mix the 2 tablespoons of flour with enough water to turn it into a smooth paste. Bring the pan juice mixture to a boil.  While whisking, add the flour paste in and continue to stir until the gravy reaches your desired consistency.  Add additional chicken stock if it becomes too thick. Season with salt and pepper to taste.

Cut the duck into pieces and place on a platter with the orange, onion and bay leaves as garnish. Serve with the gravy.


Next post: Vegan Chocolate Cupcakes

Friday, June 18, 2010

Cherry Almond Chocolate Chip Cookies


When I posted my Chocolate Chip Cookie recipe back in February, I honestly thought that was it for me. I have tried all kinds of recipes: ones that include oatmeal, ones that rest for 36 hours, ones that are chewy or crispy or something in between but I just keep coming back to the original Tollhouse recipe. I thought there was nothing else I could add to the discussion. Then I had an epiphany.

I am a big fan of almonds and after I made the Rhubarb Almond Cake a couple of weeks ago, I wanted to make something else with them.  I got thinking about cherry and almond, a pretty classic french combination, but I wanted to throw a little chocolate into the mix. I decided on Cherry Almond Chocolate Chip cookies. Boy, what a good combination. 


I added a little ground almond to the recipe along with almond extract and some glace cherries.  Then I took it a step further. Instead of regular chocolate chips I chopped up a 72% cocoa chocolate bar and added it to the mix.  Delicious, melty, chocolaty with a great chewiness from the almonds and cherries. I have a feeling it will be awhile before I go back to regular chocolate chip cookies.


Cherry Almond Chocolate Chip Cookies

2 1/4 cups all purpose flour

1 teaspoon baking soda
1 teaspoon salt
1 cup butter, slightly colder than room temperature
3/4 cup sugar
3/4 cup packed brown sugar
1/4 cup ground almonds
1/2 teaspoon vanilla
1 teaspoon almond extract
2 large eggs
2 cups chocolate chips
1 cup glace cherries


Preheat oven to 375 degrees. Position oven rack to the middle of the oven.

Mix dry ingredients together in a small bowl. In an electric mixer, beat together butter, sugars, ground almond, almond extract and vanilla until creamy. Add eggs one at a time, mixing well after each addition. Mix in dry ingredients just to incorporate, do not over mix. By hand, stir in chocolate chips and cherries.

Drop by rounded tablespoon onto an ungreased baking sheet. Bake 9-11 minutes or until edges are golden brown. Remove from oven and let sit 2 minutes. Remove to cooling rack to cool further. Enjoy warm!

Tuesday, June 15, 2010

Irish Soda Bread 2 Ways


Irish Soda Bread is something that I think has gotten a bad rap. I often hear it described as boring, too dense, heavy and tasteless. Personally, I think this reputation is undeserved. It is farmhouse fare and the whole point is that it is quick and hearty. It is a bit like a cross between bread and biscuits and it is precisely the dense and substantial texture of the bread that I find appealing.

Like anything, I think the issue hinges on the quality of the recipe. I have had soda bread that is as heavy and tasteless as a brick (or as tasteless as I would imagine a brick to be) and I have had soda bread that is moist and flavourful.


This past weekend, I made two different kinds of soda bread from two very different recipes. The first was closer to the classic recipe as it included oatmeal and buttermilk and the only leavener was baking soda. The second recipe was what I would consider more of a modern twist as the recipe included yoghurt and cider vinegar and called for both baking powder and baking soda. Both were very good, so I am going to post both recipes. Try them and see which one you like best, but don’t forget, a healthy smear of butter is soda bread’s best friend.


Traditional Irish Soda Bread
adapted from a recipe from Europeancuisines.com

3 cups whole wheat flour
2 cups all purpose flour
Scant 1/2 cup steel cut oatmeal
1 tablespoon sugar
1 teaspoon baking soda
1 teaspoon salt
2-3 cups buttermilk

Preheat the oven to 450 degrees. Line a baking sheet with a silicon mat or parchment paper.
Mix all dry ingredients together in a large bowl.  Stir to ensure the baking soda is well distributed throughout.  Make a well in the centre and pour in two cups of the buttermilk.  Stir to combine, if the dough is not wet enough add more buttermilk. 
The dough should come together quickly. Resist the urge to stir it too much as it will make the bread tough.  Just as the dough is mostly wet through and beginning to clump together dump the mixture out onto a clean surface and knead a couple of times to bring the dough together into a ball.
Move to the baking sheet and cut a cross in the top of the dough, about an inch deep.
Bake for 10 minutes at 450 degrees. Turn the heat down to 400 degrees and continue to bake for 30-35 minutes or until the centre is cooked through and springs back when touched.
Remove from the oven and let cool slightly. Serve warm with butter.


Currant and Fennel Soda Bread
adapted from EverybodyLikesSandwiches

1 cup yogurt
1/3 cup milk
1/3 cup apple-cider vinegar
1 1/2 teaspoon vanilla
3 1/2 cup all-purpose flour
1 cup wheat bran
2 1/2 teaspoon kosher salt
2 tablespoons sugar
1 teaspoon baking powder
1 teaspoon baking soda
4 tablespoon cold butter, cut into pieces
2 tablespoons fennel seeds, lightly crushed
1 teaspoon ground cinnamon
1 cup dried currants

Preheat oven to 350 degrees. Line a baking sheet with a silicon mat or parchment paper.
In a small bowl, combine yogurt, milk, vanilla and apple cider and set aside.
Mix dry ingredients together in a large bowl. Add butter pieces and cut or rub into the flour mixture until it resembles coarse crumbs. Stir in fennel, cinnamon, and currants.
Make a well in the centre and pour in the yogurt mixture and stir until the mixture starts to come together. Turn the dough out onto a lightly floured surface and knead a few times. Pat into a dome-shaped ball and place onto the baking sheet. Sprinkle some flour on top and cut a cross into the loaf. Bake for 45 minutes, or until a cake tester inserted comes out clean. Cool slightly and serve warm with butter.


Next post: Cherry, Almond Chocolate Chip Cookies

Friday, June 11, 2010

Homemade Ice Cream Sandwiches


So here it is; the story about ice cream sandwiches that was supposed to be published earlier in the week, until it got bumped by my last post. However, this story is not so much about a summertime treat (although they were very good) but more about an amazing chocolate company that shows an incredible amount of integrity in how they source, produce and sell their product. Once again, this story begins at the farmer’s market.

I went over to the new market at the Evergreen Brickworks a couple of Saturdays ago. The Brickworks is an old brick factory that supplied the building material for a number of the historic sites in Toronto, including Casa Loma and Massey Hall. The site was in a state of decay when the Evergreen Organization came in with a plan to revitalize the location and turn it into an “international showcase for urban sustainability and green design.” Although it is not yet complete, there is already a garden centre, a beautiful park space and a vibrant farmer’s market.


While I was touring the market I came upon Michael running the Chocosol booth. I had seen Chocosol at a number of different markets, including Dufferin Grove and The Stop, but this was the first time I went over. Michael 's passion for his product and his ability to engage the crowd made me curious, so I decided to find out a bit more about their chocolate.

As you can tell, I am an avid baker and I am especially fond of chocolate, so I am very particular about the products I use. I started to speak with Michael, asking all kinds of questions about the cocoa powder and bar chocolate, quite honestly, because I was skeptical. I did not think I would find a stone-ground locally made chocolate that would rival the premium brands I have been using. But after a brief conversation he had convinced me to buy a bag of both and give them a try.


When I got home I decided to first try making something with the cocoa powder. It is a beautiful dark brown, so I wanted to find a recipe that would showcase its flavour. Then I remembered these cookies. The recipe calls for a ½ cup of cocoa powder, so I knew the flavour would really come through. Plus, I had a house full of kids coming over that night, and I knew turning them into ice cream sandwiches would be a hit.

The cookies turned out great. They baked up perfectly and they had the rich and intense chocolate flavour I was looking for. Since then I have made brownies with the bar chocolate and they turned out beautifully as well.
Tomorrow I will be back at the market. I have used up my supply and I am going to get more, plus I think I will buy a bag of their coffee as well!


Homemade Chocolate Ice Cream Sandwiches


Adapted from Retro Desserts, Wayne Brachman via Smitten Kitchen
Makes 15 to 20 sandwich cookies
1 1/4 cups all-purpose flour
1/2 cup unsweetened Dutch process cocoa
1 teaspoon baking soda
1/4 teaspoon baking powder
1/4 teaspoon salt
1 cup sugar
1/2 cup plus 2 tablespoons room-temperature butter
1 large egg
Ice Cream flavour of your choice
Preheat oven to 375°F and move rack to the centre of the oven. 
In an electric mixer, mix the flour, cocoa, baking soda and powder, salt, and sugar. On lowest speed, add the butter, and then the egg. Continue mixing until dough comes together.
Using a tablespoon or a small ice cream scooper, scoop out about 1 tablespoon of the dough.  Roll into a ball and place on a baking sheet lined with parchment paper or a silicon mat.
Continue with the rest of the dough, leaving two inches of space around each ball on the cookie sheet.  With slightly wet hands, lightly press down each dough ball.
Bake for 9-10 minutes. Remove cookies to a cooling rack and cool completely before making the ice cream sandwiches.
To make the ice cream sandwiches, scoop a small amount of ice cream, about a 1/4 cup portion.  Try to scoop it into a tight ball.  Choose two cookies of a similar size. Place the scoop of ice cream on one cookie and place the second cookie on top.  Gently flatten the two cookies together with the palm of your hand until the ice cream spreads to the edge of the sandwich.  Serve immediately.


Next post:  Irish Soda Bread

Tuesday, June 8, 2010

Rhubarb Sauce, Rhubarb Cake and an interesting question


I’m going to write about something that I didn’t initially intend. I was working on a post about homemade ice cream sandwiches yesterday afternoon. I was almost ready to push the “publish” button but then I had to leave as I was going to a Toronto Youth Food Policy Council meeting. I was there to talk to them about the Toronto screening of FRESH

Now that I am back, I think I am going to save the ice cream sandwich post for another day. I want to talk instead about the question that was on my mind as I left the meeting.

The council is a fairly new venture and I was impressed by the passion of the individuals involved and the scope of the project. During the course of the evening discussions focused around the topic of Toronto food policies and local food initiatives. Discussions ranged from resources for local food banks, to the choices that restaurateurs make, to urban farming initiatives.

At the end of the night something that one young lady said stuck with me. She raised the issue of food marketing and how we are drawn to desire things that may not even be classified as food. She wanted to know how we get to a place where we are not lured by ads. Basically, I think she was asking how to get people to re-connect with real food and recognize its importance in the face of overwhelming pressure from ad campaigns and corporate food messages.

So I left with that question on my mind, “How do we re-connect with our food?” Really, it is a terrible position to be in and quite a comment on our society, but ultimately I think we have lost that basic connection with food that existed in our grandparents’ time. By that I mean somewhere along the way I think we have lost the link between where it comes from and how it lands on our plate. And, if we do see the the connection, I'm not sure we feel good about it.


I was thinking about this as I ate dinner and I was thinking about it as I rummaged around for something for dessert. Then I stumbled upon some rhubarb sauce that I had in the fridge. Immediately I thought of my mother’s kitchen and the pot of rhubarb sauce simmering on the stove.

I spooned it over some ice cream and I sat down. I remembered my mother making rhubarb sauce. She makes it often this time of year. I remembered how the kitchen smelled when it was cooking. I remembered how it looked so gorgeous, pale and pink in the pot and how I loved the first taste of it, almost too hot to eat.

That memory, that taste, makes me value the experience as much as the food. So I seek rhubarb out. I plant it in my garden for my children to enjoy. I go to the effort to make fresh rhubarb sauce and I get value out of just sitting down to enjoy a bowl.

I realized what makes me so connected to food and where it comes from are the very things that led me to begin this website in the first place. It is the memory and sense of family that I get when I cook. It is the story of my grandmother and the radishes and rhubarb that I wrote about in my first post.

Food is more than just what we eat. I think it defines who we are, our family and our relationships with others. I think that the act of cooking and communally enjoying good food is strong enough that if more people participated daily in this activity a lot of our food issues could be resolved. So that leads to another question….how do we do that? I'd love to hear your thoughts or stories.  Do you have a memory or experience that connects you to food? I would like to share some of your stories with others.

Here is a start. Rhubarb Sauce. A very simple dish. Three ingredients, ready in 10 minutes and delicious. I am also including a recipe for a Rhubarb Cake I found at A Whisk and A Spoon. It is perfect served with a little of the Rhubarb Sauce.


Rhubarb Sauce

4-5 rhubarb stalks, cut into 1 inch pieces
1/4 cup sugar or to taste
1/2 teaspoon vanilla
2 tablespoons water

Place cut rhubarb into a medium saucepan.  Add sugar and water (just enough to keep the rhubarb from sticking to the pan).  Simmer over medium low heat until the sauce thickens and the rhubarb breaks apart and becomes translucent. Remove from heat and stir in the vanilla extract. Taste to determine if the sauce is sweet enough for your liking.  If you want it sweeter, stir in a little more sugar.  Serve warm or cold on its own, over ice cream or yoghurt or over this cake.


Rhubarb Cake
adapted from Baking for All Occasions by Flo Braker via A Whisk and a Spoon

for the cake:

1 3/4 cup cake flour
1/2 teaspoon baking soda
1/4 teaspoon salt
1/8 teaspoon baking powder
1/2 cup unsalted butter, room temperature
1 cup granulated sugar
1/2 teaspoon pure almond extract
1 teaspoon pure vanilla extract
2 large room temperature eggs, lightly beaten
3/4 cup well-shaken buttermilk
3-4 narrow rhubarb stalks,  trimmed and cut into 1/8-inch thick slices, to yield 1 cup packed
1/2 cup ground almonds


for the almond topping:


2 tablespoons unsalted butter, melted
tablespoon all-purpose flour
1 tablespoon heavy cream
1/2 cup sugar
1/2 cup natural or blanched sliced almonds


Preheat oven to 350°F and move oven rack to the centre of the oven. Butter a 9-inch springform pan (or two loaf pans, as I did) and line the bottom with parchment paper.


In a small bowl, sift together flour, baking soda, salt and baking powder and set aside. In the bowl of a stand mixer fitted with the paddle attachment, beat butter on medium speed until smooth and creamy, about 2 minutes. Add sugar and extracts and continue to beat on medium speed until mixture is very light in color, about 3 minutes. Scrape down the side of the bowl occasionally.
Add the eggs one at a time. Beat after each addition until incorporated. Once all the eggs are incorporated continue to beat until the mixture is light and fluffy. Reduce speed to low and alternate flour mixture with the buttermilk, beginning and ending with the flour. Mix after each addition only until incorporated. Stop and scrape down sides of the bowl after each addition. Fold in the rhubarb slices and almonds. Spoon the batter into the pan (or pans) and spread evenly with the spatula.

Bake 40-45 minutes (30-35 minutes if you are using the loaf pans) until the cakes are light and golden and a toothpick inserted near the centre comes out clean.

15 minutes before the cake is ready, make the Almond Topping:

In a small saucepan, mix together the butter, flour, cream, and sugar and stir over low heat just until blended.
10 minutes before the cake is ready, pour the topping mixture over and sprinkle the almonds on top. Return the cake to the oven and bake until the topping spreads over the cake and just begins to bubble.

Transfer to a wire rack and let cool in the pan for about 10 minutes. Loosen the sides of the cake from the pan and unmold by unclasping the springform pan (or inverting the cake onto a cooling rack if you are using loaf pans, then turn right side again using a plate to flip the cake over) Let cool completely before serving.


Next post: Homemade Ice Cream Sandwiches (I promise)

Thursday, June 3, 2010

Spicy Hot Chocolate


I know what you are thinking “You’re doing a post about Hot Chocolate just as it’s getting crazy hot outside?!” Well, I have two things to say about that. One, this drink is good hot or cold. And two, it’s CHOCOLATE. Do I really need any more justification than that?

And not only is it chocolate, it is the best hot chocolate you will ever have. I mean it. After trying it you will wonder why you ever made that wimpy cocoa powder/milk version. You will wonder where this hot chocolate has been all your life. You will ask it to move in with you.


I found this recipe in Vogue magazine, of all places. I was waiting at the doctor’s office some years ago and came across an article about Paris that had this recipe just hidden in part of the text. I was intrigued as the author wrote “one’s first swallow should induce a long interlude of silence.” I had to try it, so I did that most annoying of things, I quietly ripped the page out of the magazine (cough, rip, cough, rip).

I still have the page folded in my recipe box, even though I copied the recipe onto a card. It’s the little trophy I keep for finding the best hot chocolate recipe of all time.


Now to be honest, it takes considerably longer to make than the aforementioned wimpy powder concoction, but it is well worth the time. In the end you will have a melting, smooth, creamy intense cup of chocolate goodness. It is like drinking a chocolate bar, a really good, dark chocolate bar.

I like to add a little heat to mine, so I add a bit of cayenne, nutmeg and cinnamon. I find it gives it a little more depth. If you don’t like that then make it without and it will be just as good.

One more thing, do not skip the blender step. This is the part that takes a little time, especially if you choose to use an immersion blender, but this is also what makes the drink. It turns an excellent hot chocolate and into the sublime.

So without any further ado...


Hot Chocolate
Adapted from a recipe found in the February 2000 issue of Vogue. It is great hot or cold. If you want to drink it cold, place the finished chocolate in the refrigerator until cold and then blend again for 30 seconds just before drinking.

2 1/2 cups 2% milk
Generous 1/4 cup sugar
1 100-gram (3 ½ ounce) bar dark chocolate (72% cocoa minimum) chopped
1/4 cup good quality cocoa powder (I use Ghirardelli)
1/4 tsp cayenne (optional)
1/8 tsp nutmeg (optional)
1/8 tsp cinnamon (optional)


In a medium saucepan, stir together the milk, sugar, chopped chocolate and cocoa powder. If you are planning on making the spicy version, add the cayenne, nutmeg and cinnamon too. Bring to a boil over medium heat, whisking until the chocolate and cocoa are dissolved and the mixture has thickened.

Reduce heat to very low and blend for 5 minutes with an immersion blender until thick and foamy. (If you wish you can remove it from the heat and blend for 30 seconds in a standard blender.) Serve in ½ cup portions as it is very rich.


Next post:  Homemade Ice Cream Sandwiches
Related Posts Plugin for WordPress, Blogger...